

WireGuard is a virtual private network (VPN) is a protocol that operates at the network layer to provide communication between devices over a public network. It encrypts and encapsulates traffic to protect information. WireGuard supports full networking capabilities including standard, policy-based, and static routes, as well as firewalls.
There are two modes available when configuring a WireGuard VPN:
-
Client mode: Configure the XBee Hive for Wi-SUN device to act as a client, so it establishes an outbound WireGuard VPN tunnel to a remote server.
-
Server mode: Configure the XBee Hive for Wi-SUN device to act as a server, so one or more remote devices can establish an inbound WireGuard VPN tunnel to the device.
Configure the WireGuard VPN
Your XBee Hive for Wi-SUN device supports using WireGuard VPN. You can configure the device for either client or server mode. For client mode, your XBee Hive for Wi-SUN is establishing an outbound WireGuard VPN connection to the WireGuard server. For server mode, your XBee Hive for Wi-SUN is acting as a WireGuard server and accepts incoming WireGuard VPN connections from one or more client devices. Regardless of how you configure the device, you will need to to create a Wireguard tunnel and corresponding interface.
Before you begin
Decide whether you want your device to establish an outbound WireGuard VPN connection or if you want it to act as a WireGuard server. Each mode requires different information.
For client mode
You need the following information from the WireGuard server:
-
Private key
-
Remote endpoint address or hostname
-
Remote endpoint port
-
Remote endpoint public key
-
Preshared key (optional)
-
Local and remote IP addresses
For server mode
You need the following information:
-
Client public key
This key can come from the client device or you can generate it from the Digi device’s Admin CLI console using the wireguard generate [tunnel_name] [client_name] command after configuring the Wireguard server settings on the Digi device.
|
-
Pre-shared key (optional)
-
Local and remote IP addresses
-
Select the device in Remote Manager and click Actions > Open Console, or log into the XBee Hive for Wi-SUN local command line as a user with full Admin access rights.
Depending on your device configuration, you may be presented with an Access selection menu. Type admin to access the Admin CLI. -
At the command line, type config to enter configuration mode:
> config (config)> -
Save the configuration and apply the change.
(config vpn iptunnel gre_example)> save Configuration saved. > -
Type exit to exit the Admin CLI.
Depending on your device configuration, you may be presented with an Access selection menu. Type quit to disconnect from the device. -
At the command line, type VPN to enter configuration mode for VPN:
> config vpn (config vpn)> -
Type wireguard to enter configuration mode for WireGuard.
> config vpn wireguard (config vpn wireguard) > -
The table below lists the required settings for creating and configuring a client WireGuard tunnel.
Configuration Description add
Add a new WireGuard tunnel.
> config vpn wireguard add name
(config) >
enable
The WireGuard tunnel is enabled by default.
You may want to temporarily disable the tunnel while it is being set up, for future use, or if you want to stop the tunnel while testing other configuration changes.
-
To disable:
(config)> vpn wireguard name enable false (config)> -
To enable:
(config)> vpn wireguard name enable true
(config)>
peer
-
Determine if the XBee Hive for Wi-SUN will act as a client or server.
-
If this XBee Hive for Wi-SUN is the WireGuard client, then only add one peer. The peer is the remote WireGuard server to which it connects.
-
If this XBee Hive for Wi-SUN is the WireGuard server, add one or more peers. The peer(s) are the remote WireGuard clients that will connect to this device.
-
-
Create the peer(s).
-
For a peer that acts as the remote WireGuard server, configure the following settings:
-
[Remote] Device managed public key
(config vpn wireguard [name])> generateParameters:
-
tunnel: Tunnel name (required) -
peer: Peer (required)
-
-
[Remote] Public key
(config)> vpn wireguard name peer public_key (config)> -
[Remote] Pre-shared key (optional)
(config)> vpn wireguard name peer psk (config)> -
[Remote] Allowed addresses: only traffic destined for an IP address added here will be sent to this peer.
(config)> vpn wireguard name peer overlay (config)> -
[Remote] Endpoint address
(config)> vpn wireguard name peer endpoint (config)> -
[Remote] Endpoint port
(config)> vpn wireguard name peer port
(config)>
-
-
For a peer(s) that acts as the remote WireGuard client, configure the following settings:
-
[Client] Public key
(config)> vpn wireguard name peer public_key (config)> -
[Client] Pre-shared key (optional)
(config)> vpn wireguard name peer psk (config)> -
[Local and Remote] Allowed addresses
-
-
autogenerate
Enable to allow the XBee Hive for Wi-SUN to generate its own public and private keys. If this setting is enabled, it triggers the XBee Hive for Wi-SUN to automatically generate a private key and corresponding public key.
-
To enable:
> config vpn wireguard add name autogenerate true (config)> -
To disable:
> config vpn wireguard add name autogenerate false
(config)>
port
The WireGuard connection value of 51820 is populated by default.
(config)> vpn wireguard name port
(config)>
private-key
Type the private key for the WireGuard tunnel, if the Device managed by private key setting is disabled.
> config vpn wireguard add name private key value
(config)>
With
valuebeing a 32-byte string encoded in base 64. -
-
The table below lists the required settings for creating and configuring a new interface.
Configuration
Description
add
Add a new interface.
> (config network interface) >  add name
(config)>
Where
nameis the name of the new inerface.
For example,newWGtunnel1.enable
The interface is enabled by default.
You may want to temporarily disable the tunnel while it is being set up, for future use, or if you want to stop the tunnel while testing other configuration changes.
-
To disable:
(config network interface ) > name enable false (config)> -
To enable:
(config network interface) >  name enable true
(config)>
Where
nameis the name of the new interface.
zone
Set the zone to external.
(config network interface [name]) > zone external
(config)>
device
Add the network device used by this interface.
(config network interface [name]) > device /vpn/wireguard/[name]For example,
device /vpn/wireguard/newWGtunnel1.IPv4
-
Add the address and netmask assigned to this interface.
> config network interface [name] ipv4) > address IPv4_[IPaddress]/[netmask]For example,
ipv4_10.200.200.1/24. -
Add the IP address of the DNS server.
(config network interface [name] ipv4) > dns
(config network interface [name] ipv4 dns) > ipv4_[address].
Address is the IP address of the DNS server. For example,
ipv4_10.200.200.1.
-
-
Log into Digi Remote Manager or log into the local Web UI as a user with full Admin access rights.
-
Access the device configuration:
-
Remote Manager
-
Locate your device as described in Use Digi Remote Manager to view and manage your device.
-
Click the Device ID.
-
Click Settings.
-
Click to expand Config.
-
-
Local Web UI
-
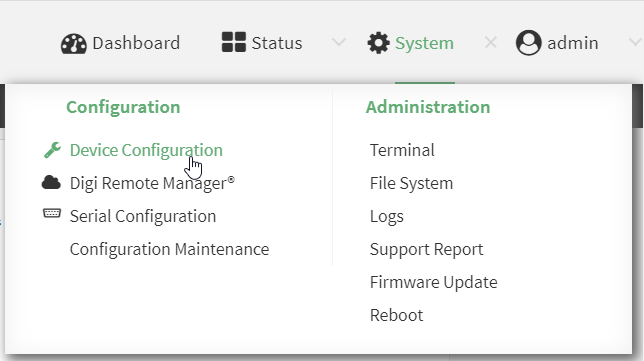
On the menu, click System. Under Configuration, click Device Configuration.
The Configuration window is displayed.
-
-
-
To create a WireGuard tunnel, navigate to VPN > WireGuard > WireGuard tunnel.
-
Click + to add a new WireGuard tunnel.
-
Type a name for the tunnel.
-
Click OK.
The settings for your new tunnel appear.Tunnel setting
UI configuration
Enable
The new tunnel is enabled by default. It can be disabled if the tunnel is being set up for future use or if you want to stop the tunnel while testing other configuration changes.
Peers
-
Click + to add a new peer.
-
If this XBee Hive for Wi-SUN is the WireGuard client, then only add one peer. The peer is the remote Wireguard server to which it connects.
-
If this XBee Hive for Wi-SUN is the WireGuard server, add one or more peers. The peer(s) are the remote WireGuard clients that will connect to this device.
-
-
Configure the settings for the new peer(s).
-
If the new peer is to act as the WireGuard server, make sure to configure the following settings:
-
[Remote] Public key
-
[Remote] Pre-shared key (optional)
-
[Remote] Allowed addresses: Only traffic destined for an IP address added here is sent to this peer.
-
[Remote] Endpoint address
-
[Remote] Endpoint port
-
-
If the new peer is to act as a remote WireGuard client, make sure to configure the following settings:
-
[Client] Public key
-
[Client] Pre-shared key (optional)
-
[Local and Remote] Allowed addresses
-
-
Device managed private key
Enable to allow the XBee Hive for Wi-SUN to generate its own public and private keys. If this setting is enabled, it triggers the XBee Hive for Wi-SUN to automatically generate a private key and corresponding public key. This private and public key is used to establish the encrypted communication between the client and peer via the Wireguard tunnel. To see the public key, navigate to Status > VPN > WireGuard.
Private key
Type the private key for the Wireguard tunnel, if the Device managed private key setting is disabled.
Endpoint port
The WireGuard connection value of 51820 is populated by default.
-
-
Modify the settings.
-
To create the WireGuard interface, navigate to Network > Interfaces > Interface.
-
Click + to add a new interface.
-
Type a name for the interface.
-
Click OK.
-
The settings for your new interface appear.
Tunnel setting
UI configuration
Enable
The new interface is enabled by default. It can be disabled if it is being set up for future use or if you want to stop using the interface while testing other configuration changes.
Zone
Select External.
Device
Select the device the interface will use, which is the new WireGuard tunnel you created.
IPv4
-
Click IPv4 to expand the settings menu.
-
For Address, type the IP address and netmask assigned to this interface using the syntax
IPv4_address/netmask.
For example,10.200.200.1/24`. -
Click to expand DNS servers.
-
Click + to add a new DNS server.
-
For DNS Server, type the IP address of the DNS server using the syntax
IPv4_address.
For example,10.200.200.1.
-
-
Click Apply to save the new configuration settings.