

Follow these steps to set up your ConnectCore 95 Development Kit hardware.
Run serial console setup script
| You only need to complete this step if you are running Linux. If so, you may need to install a driver for the serial interface of the ConnectCore 95 Development Kit. |
-
Download the script for the USB-to-serial driver.
-
Give execution permission to the file in your computer and run it as administrator.
$ chmod +x install_usb_driver.sh
$ sudo ./install_usb_driver.sh

Installing Cypress USB driver.
Rule "/etc/udev/rules.d/90-cyusb.rules" doesn't exist, creating a new one.
File "/etc/modprobe.d/blacklist.conf" exists, checking if the rule is already there.
Rule for cytherm not found. Adding cytherm to the blacklist.
Please plug/unplug your usb device to be recognized.
1. Mount the heat sink
The ConnectCore 95 Development Kit includes a heat sink to help dissipate heat generated by the ConnectCore 95 SMARC SOM.
| Digi strongly recommends you use the heat sink to prevent overheating and prolong the lifespan of the components. |
To mount the heat sink:
-
Unscrew the four screws attaching the SMARC SOM to the DVK. Set them aside; you will not need them anymore.
-
Carefully unplug the SOM from the DVK.
-
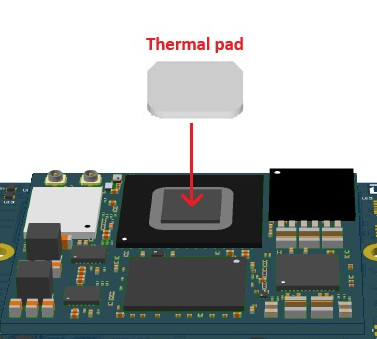
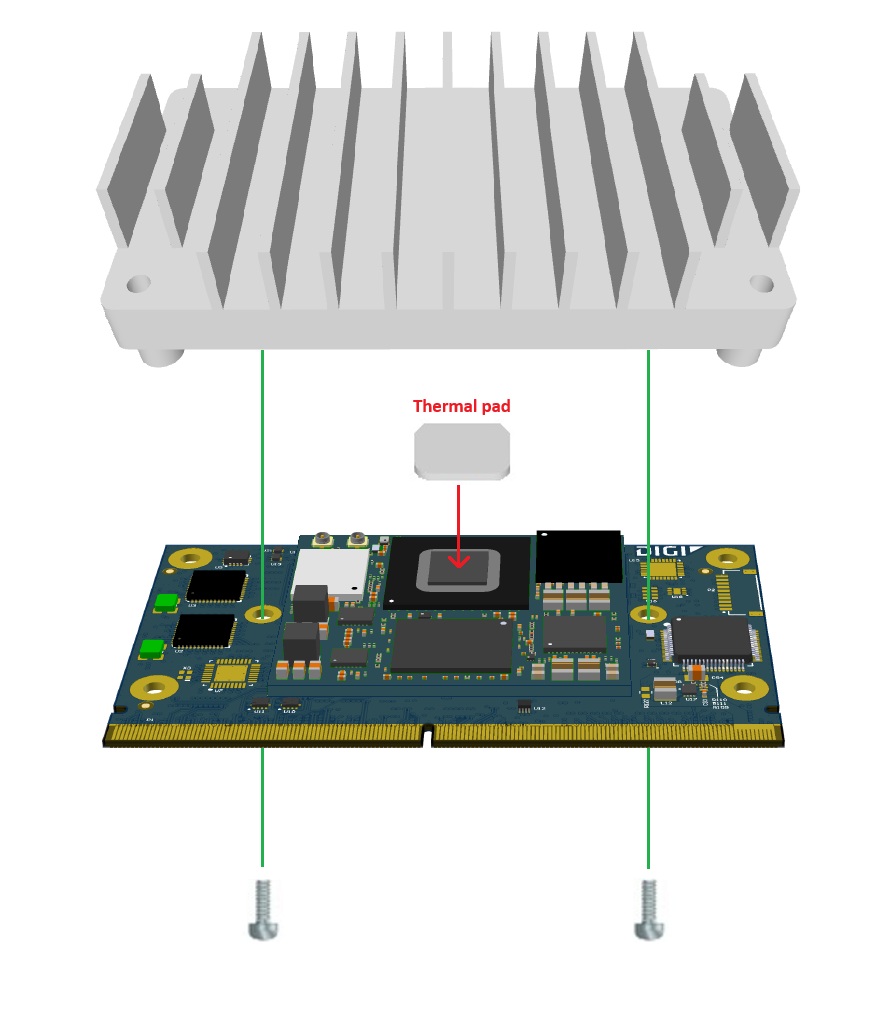
Remove the mounting kit from the plastic bag. The kit includes one heat sink, one thermal pad, two 5mm screws, and four 18mm screws.
-
Line up the thermal pad as shown below and carefully place it on the SOM, taking care not to compress it.
-
Set the heat sink onto the SOM.
The full surface of the thermal pad must make contact with both the SOM and the heat sink, without gaps. Take care not to flatten or warp the thermal pad. -
Using the two screws in the mounting kit (5mm), attach the the heat sink to the SOM from the underside of the SOM.
-
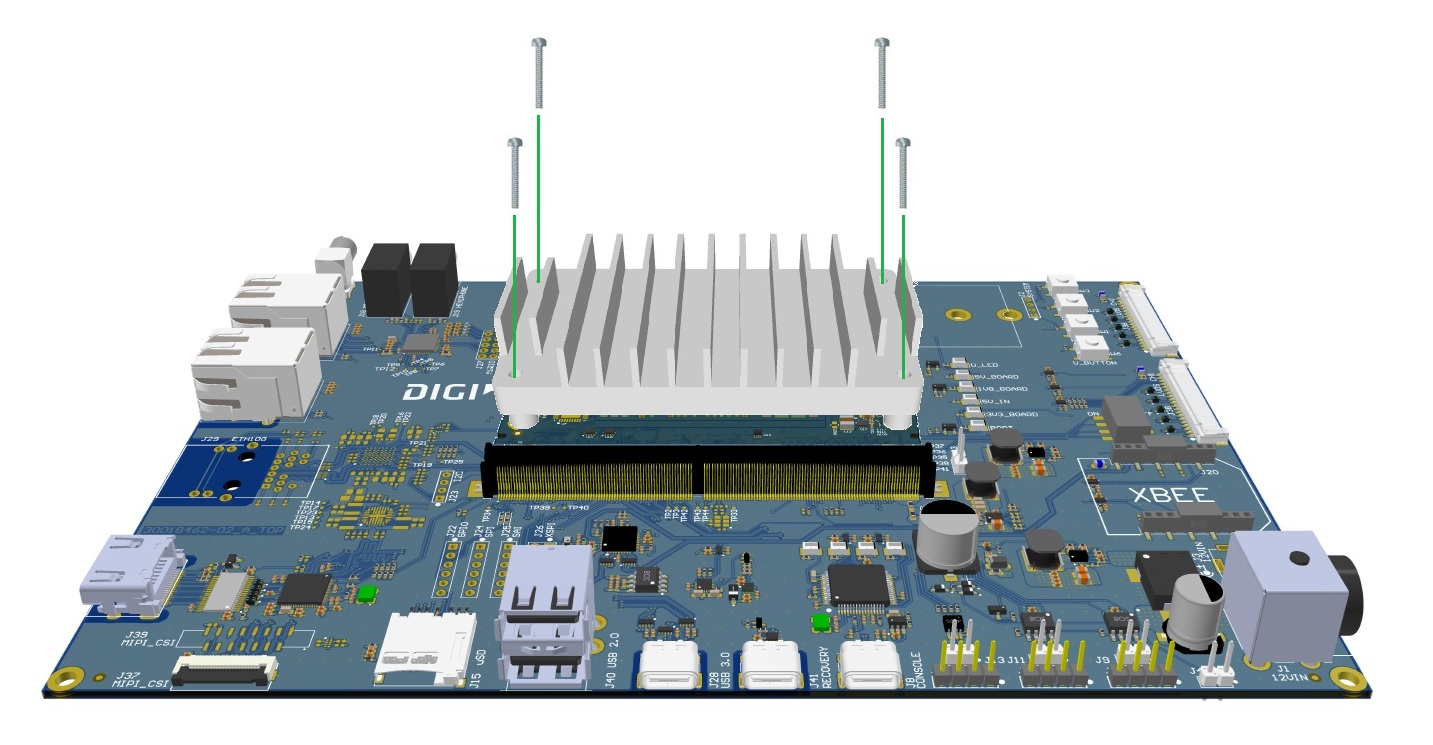
Plug the SOM containing the heat sink back into the SMARC connector on the DVK.
-
Reattach the SOM to the DVK with the remaining four screws (18mm).
2. Connect the hardware
-
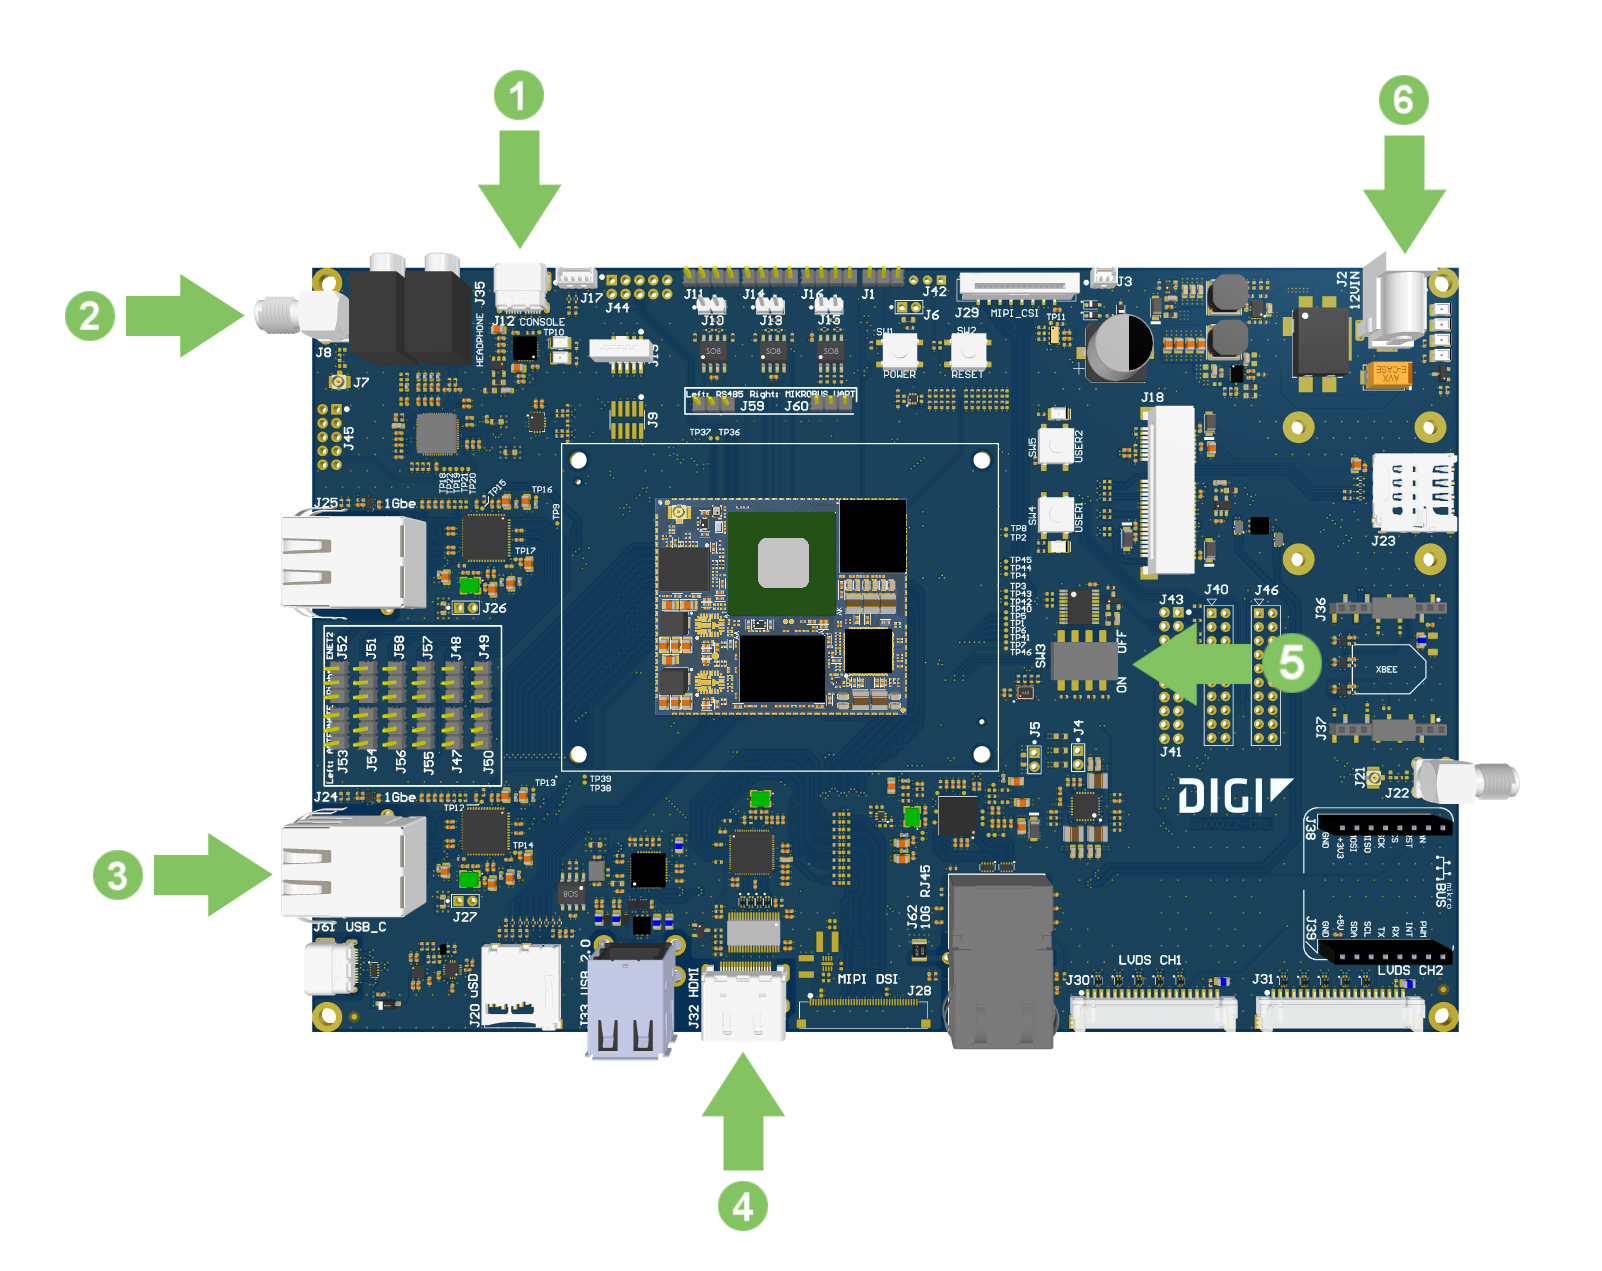
Connect the USB type-C cable to the USB CONSOLE connector on the board and to your host computer if it isn’t already done.
-
Connect the Wi-Fi antenna to the SMA antenna connector.
-
Connect the Ethernet cable (not included) to the Ethernet port.
-
Optional: Connect an HDMI cable (not included) to the HDMI connector and then to an HDMI-compatible display.
-
Make sure the boot micro-switches (SW4) are set to boot from the eMMC:
ON1 2 3 4 -
Connect the 12V/4A power supply to the power connector. First connect the power supply to a power cord (not included).
