

After forming the network and confirming communication between nodes, you can perform a throughput test between the XBee devices in your network. The objective is to measure throughput, then adjust relevant parameters to observe how these changes impact network performance and optimize results.
Run a Throughput test using XBee Studio
To run a throughput test:
-
Ensure that the XBee modules from your kit are connected to your PC and discovered by XBee Studio.
-
Click on an XBee module to open its device tab.
-
In the device tab, select the Throughput Test option from the left sidebar.
-
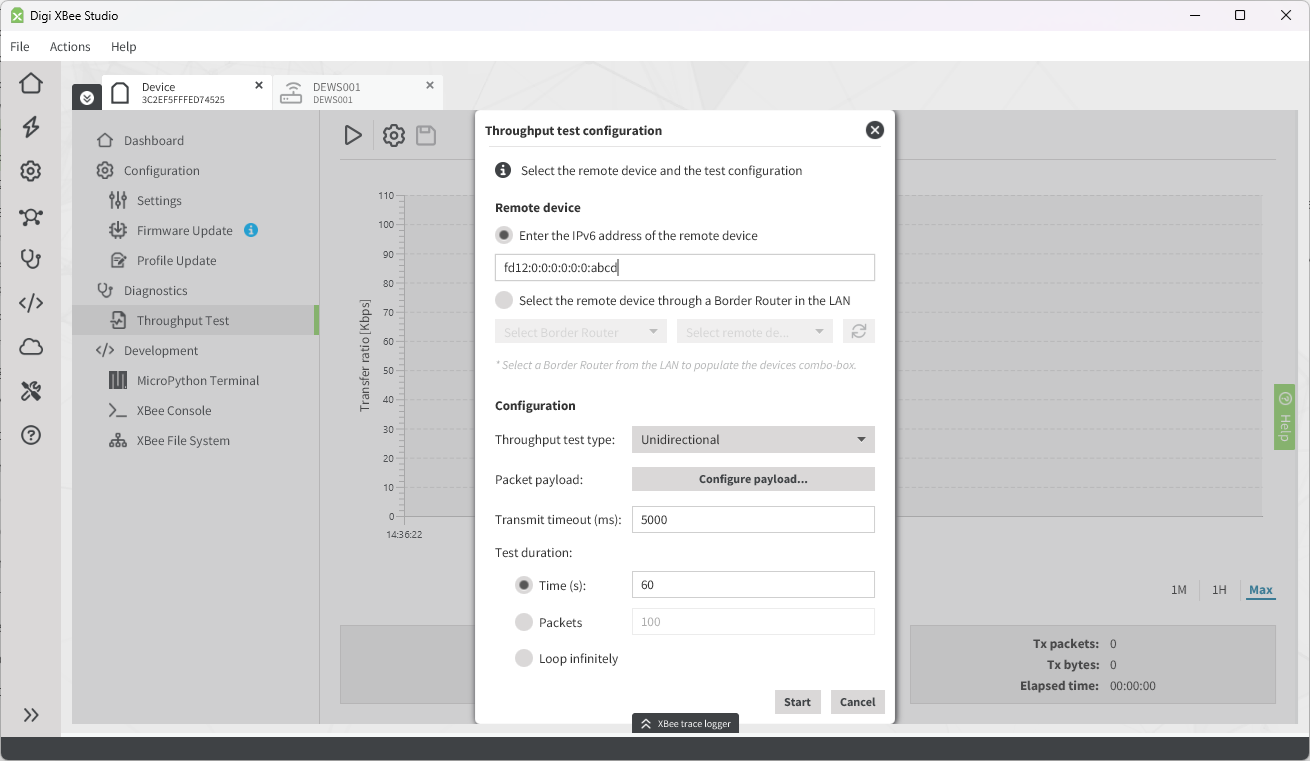
When the page loads, a popup appears to configure the throughput test.
-
Enter the IPv6 address of the remote device manually. To obtain it:
-
Collapse all tabs by clicking on the black pinned tab with an arrow pointing down on the top-left corner of the workspace.

-
Open the device tab of your other device.
-
Right-click the tab label and select Copy > Mesh IPv6.
-
Paste the IPv6 into the Throughput test configuration popup’s corresponding field. For example:
-
-
Leave the remaining parameters at their defaults to run a unidirectional API mode test with maximum-size packets over 60 seconds.
-
Click Start to execute the test.
You can repeat the test as many times as you want or even select different local and remote XBee devices.
| XBee Studio is designed to simulate real-world behavior and prioritize consistency. It sends a new packet only after receiving an acknowledgment (ACK) for the previous one. This mirrors realistic communication patterns but may not reflect maximum theoretical throughput. |
Understand how network parameters affect performance
After learning how to run a throughput test, it is important to understand which network parameters influence performance. Adjusting these parameters allows you to optimize the network for your specific requirements.
In this section you will set the fastest network configuration for your regulatory domain. To do so:
| Keep in mind that there is a tradeoff between speed and range depending on the modulation settings you configure. Higher data rates typically reduce communication range, while lower data rates increase range but decrease throughput. Choosing the right modulation parameters allows you to balance performance and coverage based on the specific needs of your deployment. |
Update the XBee Hive Wi-SUN configuration
All of the devices in the network must have the same values for the following parameters:
-
Channel Plan ID
-
PHY Operating Mode ID
-
Network Name
-
Network Size
If your network is already formed, you can retain the following values in the XBee Hive Wi-SUN device:
-
Network name: Digi Wi-SUN - Network 1
-
Network size: Small (1 - 100)
Configure these settings in your XBee Hive Wi-SUN device to improve the performance of the network:
-
Channel Plan ID: 33
-
PHY Operating Mode ID: 86 (OFDM, 863.1 MHz, 300kbps)
-
Channel Plan ID: 5
-
PHY Operating Mode ID: 26 (OFDM, 903.2 MHz, 2400kbps)
To set these values:
-
Open the device tab of your XBee Hive Wi-SUN in XBee Studio.
-
Click on Settings on the left sidebar within the device tab. This opens the settings of the device in your default web browser.
-
In the web browser, navigate to the Wi-SUN Border Router category.
-
Set the values and click the blue Apply button on the right of the top black toolbar.
Update the XBee Wi-SUN devices configuration
Next, configure each XBee device to match the Border Router’s network settings. Ensure the following settings have the same value as their counterparts for the XBee Hive Wi-SUN:
| AT Setting | Name | Border Router counterpart |
|---|---|---|
Channel Plan |
Channel Plan ID |
|
PHY Operating Mode |
PHY Operating Mode ID |
|
Network Name |
Network Name |
|
Network Size |
Network Size |
To configure an XBee module:
-
Open the device tab of the XBee Wi-SUN.
-
Click on Settings on the left sidebar within the device tab.
-
Change the following network settings:
-
Channel Plan ID: 33 [0x21]
-
PHY Operating Mode ID: 86 (OFDM 1, 903.2 MHz, 2400kbps) [0x56]
-
-
Click on the Write all device settings button on the top toolbar.
-
Open the device tab of the XBee Wi-SUN.
-
Click on Settings on the left sidebar within the device tab.
-
Change the following network settings:
-
Channel Plan ID: 5 [0x5]
-
PHY Operating Mode ID: 26 (OFDM 1, 903.2 MHz, 2400kbps) [0x38]
-
-
Click on the Write all device settings button on the top toolbar.
|
Repeat these steps for each XBee module. To confirm that a device has joined the network, check the |
Run the throughput test
After the network is formed, run the same throughput test as you did in the Run a Throughput test using XBee Studio section.
The results should be different in terms of Instant and Average transfer ratio. Experiment with other network configurations to find the optimal setup for your needs.
Alternative configurations for improved throughput
Beyond standard network settings, the following device-level options can enhance throughput:
-
Baud rate (BD setting): Boosting the baud rate above 115200 prevents serial limitations. To avoid data loss, ensure that the serial port on the PC is opened with hardware flow control enabled (XBee devices have hardware flow control enabled by default):
-
In XBee Studio, clear the devices in the device browser by clicking Discovery settings > Clear devices in the Discovery tools toolbar at the top.
-
Click on Discovery settings > Advanced discovery options in the Discovery tools toolbar at the top.
-
Select Hardware in the Flow control box.
-
Ensure the baud rates to use by your devices are selected in the Baud rate box. This way, they will be discovered in future attempts.
-
Apply the changes.
-
Click on the Launch device discovery button in the Discovery tools toolbar at the top.
-
You can rerun the throughput test and inspect how results vary.
-
-
Transparent mode (AP setting): Configuring the local XBee device in Transparent mode can improve throughput by reducing transmission overhead. However, this mode has limitations and may not be suitable for all scenarios.
-
In XBee Studio, open the device tab of the device that will initiate the throughput test.
-
In the Dashboard page, click on the Operating mode quick action in the Quick Actions section in the bottom half of the page. A popup appears to configure the operating mode.
-
Select the Transparent mode option in the combo-box.
-
Click the green Apply button.
-
Ensure the remote device is also plugged into the PC and discovered by XBee Studio.
-
Go to the Throughput Test page in the left sidebar within the local device tab, the one in Transparent mode.
-
The Throughput test configuration popup appears but it is different. It shows a combo-box to select a secondary local device that will act as remote.
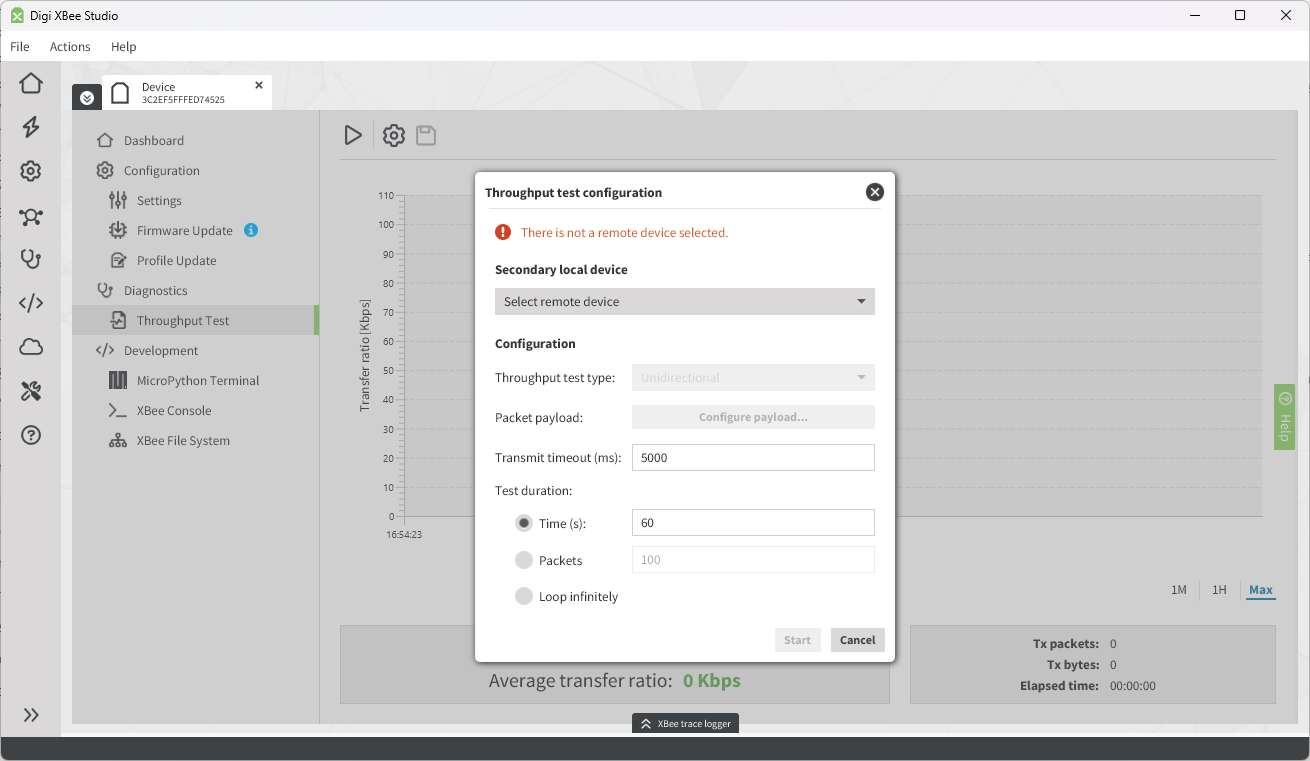
This control should be populated with the IPv6 address of the remote device. Select it.
-
Leave the rest of the configuration as default since it should replicate the first throughput test that you have executed.
-
Click Start.
-
Now you have a comprehensive understanding of how to execute throughput tests and adjust settings to optimize your XBee Wi-SUN network. Feel free to explore additional configurations to further enhance your network’s performance and deployment.
About the XBee Studio test environment
XBee Studio is designed for consistency and realistic simulation. It runs throughput tests by sending packets only after receiving acknowledgments, which reflects actual behavior in production networks.
While this ensures predictable results, it may not reflect the device’s full performance potential.
To push performance further:
-
Use SPI instead of UART to reduce overhead and improve data rates, especially when configured with an appropriate clock speed. This can help avoid serial communication bottlenecks during high-throughput scenarios.
-
Develop a custom test tool using Digi’s official libraries. These allow full control over how packets are handled, such as skipping acknowledgments or bypassing remote reception, making it possible to reach higher performance levels than XBee Studio’s built-in test supports.