

Up to this point, you have configured and explored your Wi-SUN network locally. The next step is to connect the solution to the cloud by registering the Border Router in Digi Remote Manager and interacting with it remotely.
This exercise also introduces cellular connectivity by activating and validating the Global Connect data plan included with the Wi-SUN Development Kit, allowing the Border Router to reach the cloud without relying on Ethernet connectivity.
|
Currently, cloud connectivity and remote management are supported only on the Border Router. Wi-SUN nodes connected through it cannot be managed directly from the cloud. Future updates are expected to extend cloud access to XBee Wi-SUN devices in the network. |
In this exercise, you will:
1. Register the XBee Hive Wi-SUN device in Digi Remote Manager
Connecting the solution to the cloud begins by associating the Border Router with your Remote Manager account. To facilitate this task, you can store your account credentials in XBee Studio first. These credentials allow the Border Router to authenticate with Digi cloud services and prepare it for provisioning:
-
Open the the Remote Management page by clicking the cloud icon in the left sidebar of the application.
-
Click on the Manage Accounts button. The Manage Accounts page appears.
-
Select Digi Remote Manager in the Add account combo-box on the right side of the page.
-
Fill in the Username and Password fields to add your account.
-
Click Add to store the account credentials in XBee Studio for further usage.
Once done, the Border Router can be registered in Digi Remote Manager using the Remote Manager Registration Quick Action. This process securely provisions the device in Remote Manager and enables cloud-based communication. To register the XBee Hive Wi-SUN device:
-
Open the device tab in XBee Studio by selecting your XBee Hive Wi-SUN. The device tab opens, displaying the Dashboard page.
-
Click the Remote Manager Registration Quick Action.
-
Select the account from the list.
-
Only if the password field appears below the account selector, enter the default password of the XBee Hive Wi-SUN device.
The default password is printed on the label attached to the device.
-
-
Click Register.
After completing the process, the device is automatically registered and becomes visible in your Digi Remote Manager account.
2. Interact through the cloud
From the cloud, you can monitor the device, perform management operations, and access diagnostic information.
As a simple validation of cloud connectivity, you can reboot the device using Digi Remote Manager:
-
Open Digi Remote Manager in your default browser. You can access it directly from XBee Studio:
-
Open the Remote Management page by clicking the cloud icon in the left sidebar.
-
Click Access Remote Manager.
-
-
Log in using your account credentials. The DRM Dashboard page appears.
-
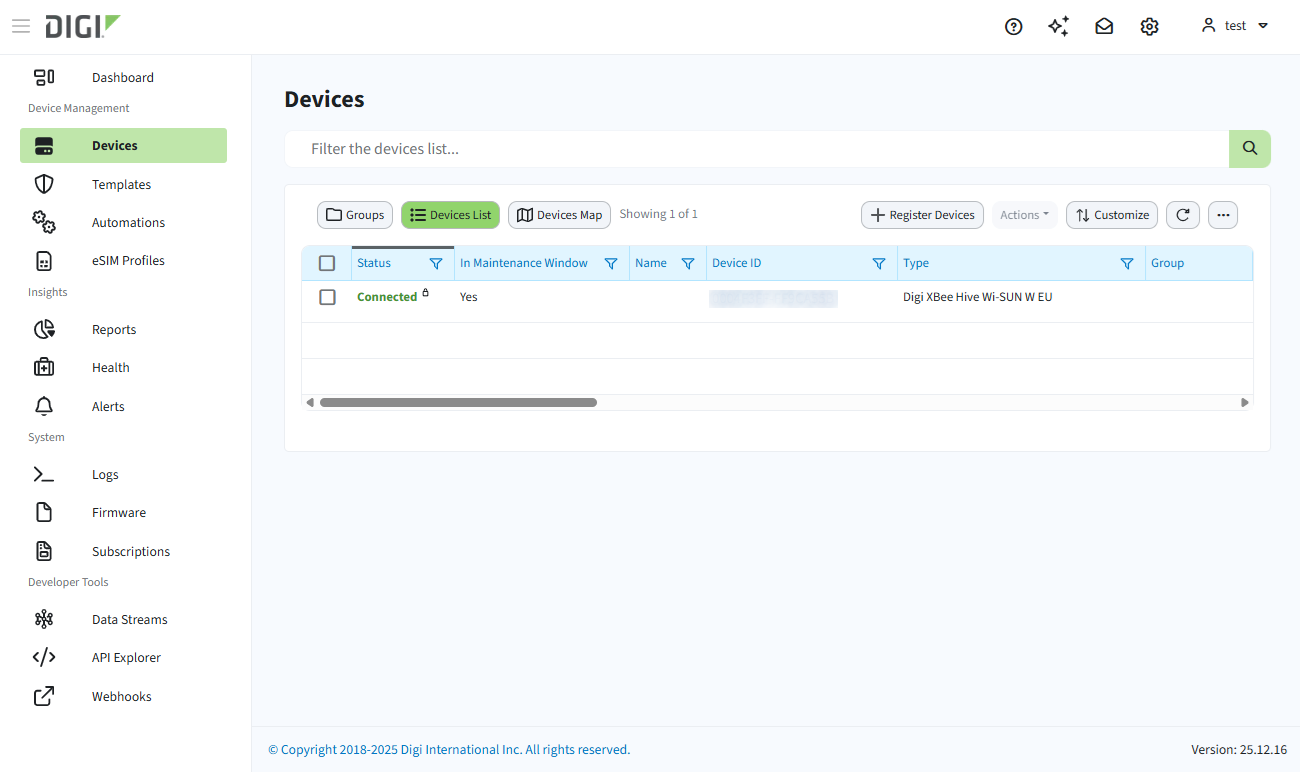
Click Devices in the left sidebar. The list of registered devices is displayed in table format.
-
Select your XBee Hive Wi-SUN device by clicking the checkbox in the first column.
-
Click Actions in the upper-right corner of the devices table.
-
Select Reboot.
-
Confirm the action and observe the device LEDs during the reboot process.
You just performed an action on a device through the cloud. This confirms that the device can be monitored and controlled remotely, as long as it has an active internet connection.
In addition to rebooting the device, Digi Remote Manager provides several remote management capabilities for the Border Router, including:
-
Remote configuration and firmware updates: Update device settings and firmware without physical access.
-
Remote console access: Open a secure shell session to interact with the device operating system.
-
File system access: Browse, upload, or retrieve files stored on the device.
-
Monitoring, alerts, and automations: Track device status and trigger actions based on events or conditions.
These features allow the Border Router to be managed and maintained entirely from the cloud.
| For advanced workflows and features, see the Digi Remote Manager user guide. |
3. Activate cellular connectivity
With cloud access verified over Ethernet, the next step is to validate cellular connectivity as an alternative upstream path.
The Border Router includes a Global Connect SIM card that provides cellular data connectivity. To enable it, start by storing your IoT Suite account credentials in XBee Studio:
-
Open the the Remote Management page by clicking the cloud icon in the left sidebar of the application.
-
Click on the Manage Accounts button. The Manage Accounts page appears.
-
Select IoT Suite in the Add account combo-box on the right side of the page.
-
Fill in the Username and Password fields to add your account.
-
Click Add to store the account credentials in XBee Studio for further usage.
Once the credentials are available, the SIM card can be activated using the eSIM Activation Quick Action in XBee Studio. This activation process allows your SIM card to use cellular connectivity as an upstream path to the cloud:
-
Open the device tab of your XBee Hive Wi-SUN in XBee Studio. The device tab appears showing the Dashboard page.
-
Click on the eSIM Activation Quick Action. A list with your account appears after the SIM information is obtained from your device.
-
Click the Activate button. After a while, the SIM card is activated and the device is ready to communicate over the cellular network.
4. Connect to the cloud over cellular
The simplest way to confirm that cellular connectivity is functioning correctly is to disconnect Ethernet access and rely exclusively on the cellular interface. With cellular enabled, the device should remain reachable through Digi Remote Manager. To validate this:
-
Disconnect the Ethernet cable from your XBee Hive Wi-SUN device.
-
In the Devices page of Digi Remote Manager, click Refresh.
-
Verify that the Connection Status of the device remains Connected.
-
Reboot the device again as described in Interact through the cloud.
If the reboot completes successfully, cloud communication is occurring over the cellular interface.
Learn more
Global Connect data plans and cellular service management are handled through the IoT Suite portal, which provides visibility into data usage, plan status, and SIM management.
You can access the IoT Suite portal through XBee Studio:
-
Open the Remote Management page by clicking the cloud icon in the left sidebar of the tool.
-
Click Access IoT Suite.
-
Log in using your account credentials.
For additional information, refer to: