Create an automation
To create an automation:
- From the main menu, click Management > Automations.
- Click Create.
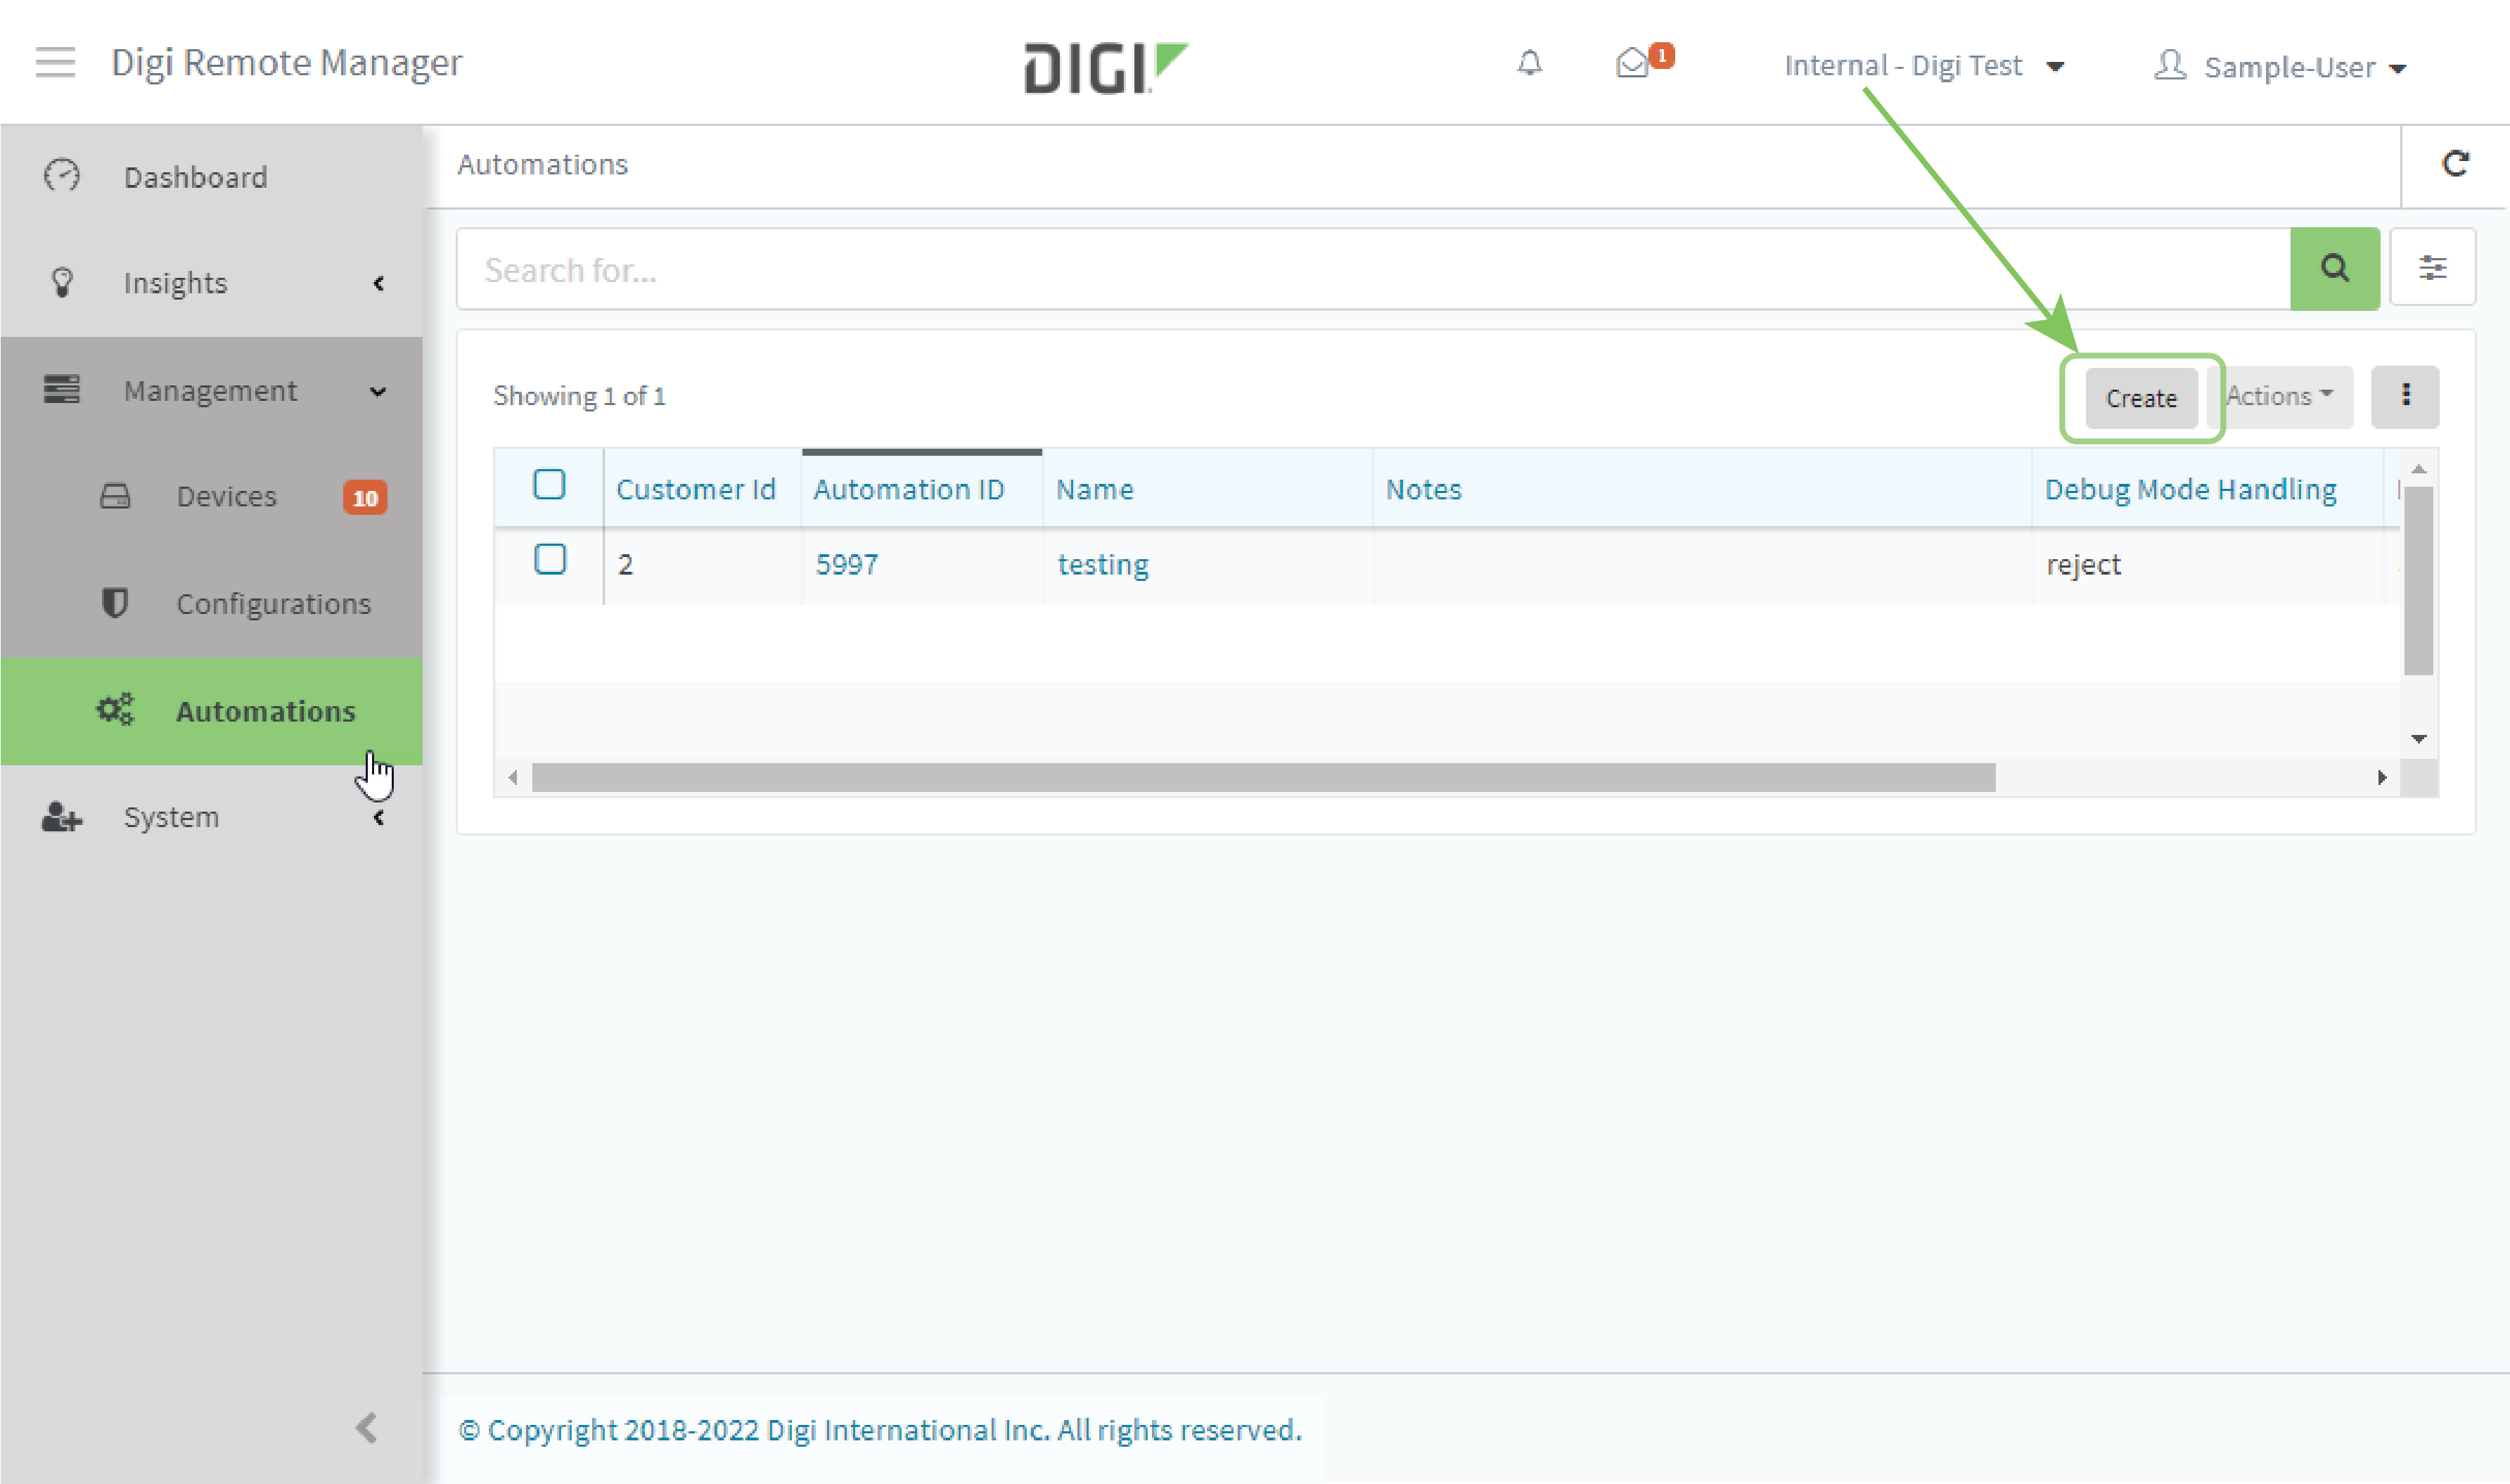
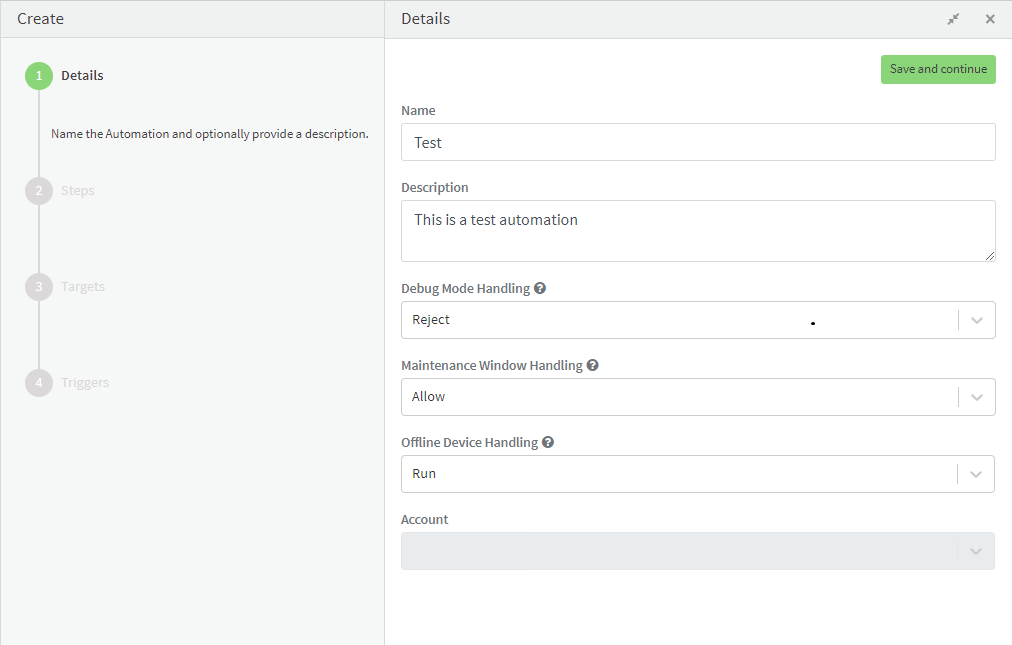
The Details page displays.
-
Type a Name for the automation.
-
Optionally, type a Description for the automation.
-
For Debug Mode Handling, select one of:
-
Reject: The automation fail at the start of the run if any device is in debug mode.
-
Allow: The automation will run regardless of the debug mode status of the devices.
-
Cancel: The automation will fail during any step in the automation if a device transitions to debug mode.
-
-
For Maintenance Window Handling, select one of:
-
Reject: The automation fail at the start of the run if any device is outside of its maintenance window.
-
Allow: The automation will run regardless of the devices' maintenance window.
-
Cancel: The automation will fail during any step in the automation if a device is outside of its maintenance window.
Note The maintenance window is defined on the device. See your device documentation for information about how to define the maintenance window.
-
-
For Offline Device Handling, select one of:
-
Run: The automation will run normally if a device is offline at the start of the run. Steps may fail if they required the device to be online.
-
Skip: The automation will not run on any devices that are offline at the start of the run. Skipped devices are not included in the count, and there are no messages or results generated for the skipped devices.
-
- Click Save and continue when finished.
The Steps page displays.
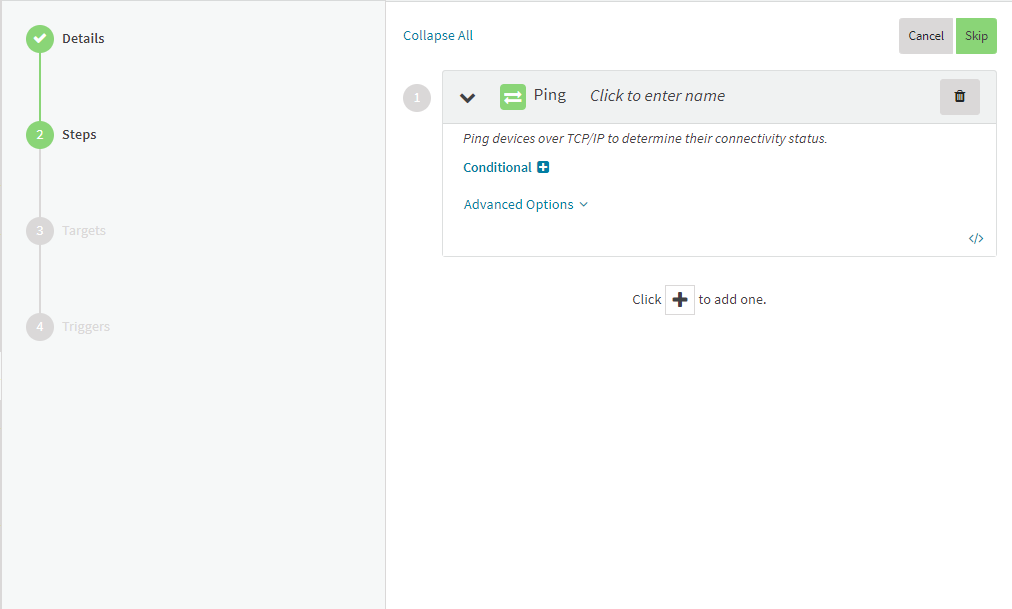
The Steps page automatically includes a Ping step as the first step.
To add another step:
Click ; repeat to add additional steps as necessary.
To remove the Ping step:
Click .
Click to add a different step; repeat to add additional steps as necessary.
For information about each type of step, see Automation steps.
-
Click Save and continue when finished with step configuration.
The Targets page displays.
-
(Optional) Select the Groups, Tags, or Devices that the automation will act on.
Targets are only required if the automation is run automatically. If the automation is run manually, you select the targets at run time.
-
Click Save and continue when finished.
The Triggers page displays.
-
Triggers are only required if the automation is run automatically. If the automation is run manually, you select the targets at run time.
-
To configure the
-
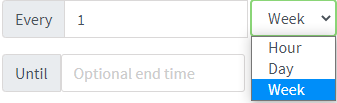
Click to enable By Schedule.
-
Click Start Time.
-
From the calendar provided, select the date and time that the
-
By default, the
-
Type or select the number of times, and select the time period.
-
(Optional) Click Until to select a date and time when the automation schedule will stop repeating.
-
-
-
To configure the automation to be triggered by device activity, click to enable one or more of the following:
-
Run when a device enters the target scope
-
Run when a device in the target scope enters a maintenance window:
-
Run when a device in the target scope leaves debug mode
Target scope refers to a device that either:
-
Is member of a group that was selected on the Target page.
-
Has a tag that was selected on the Target page.
-
Is one of the devices included on the Target page.
-
-
-
Click Save to save the automation, or click Save and Run Now to save the automation and run it immediately.
 PDF
PDF


