Use Digi Remote Manager to e nable and configure WAN bonding on multiple devices
Note support must be enabled in Digi Remote Manager. Contact your Digi sales representative for information.
You must also set up the WAN bonding server. This can be done using one of three mechanisms:
- Set up a WAN bonding server on physical hardware or a Virtual Private Server (VPS) in your local environment. See Bondix documentation for instructions.
- Unwired Networks maintains a number of WAN Bonding servers throughout the world, focused mainly on locations in the United States, Europe, and Australia. Contact them for WAN bonding hosting and configuration services.
- Digi Professional Services can setup, manage, and maintain your WAN bonding servers.
You can also setup a trial server at the Bondix website for testing purposes.
To
- Add the WAN bonding entitlement to your device
From the
In the WAN Bonding entitlement card, click and select Assign to Device.
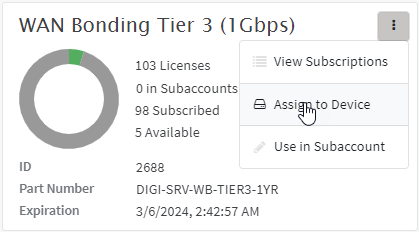
Select the appropriate devices.
-
-
For the Settings step in the configuration:
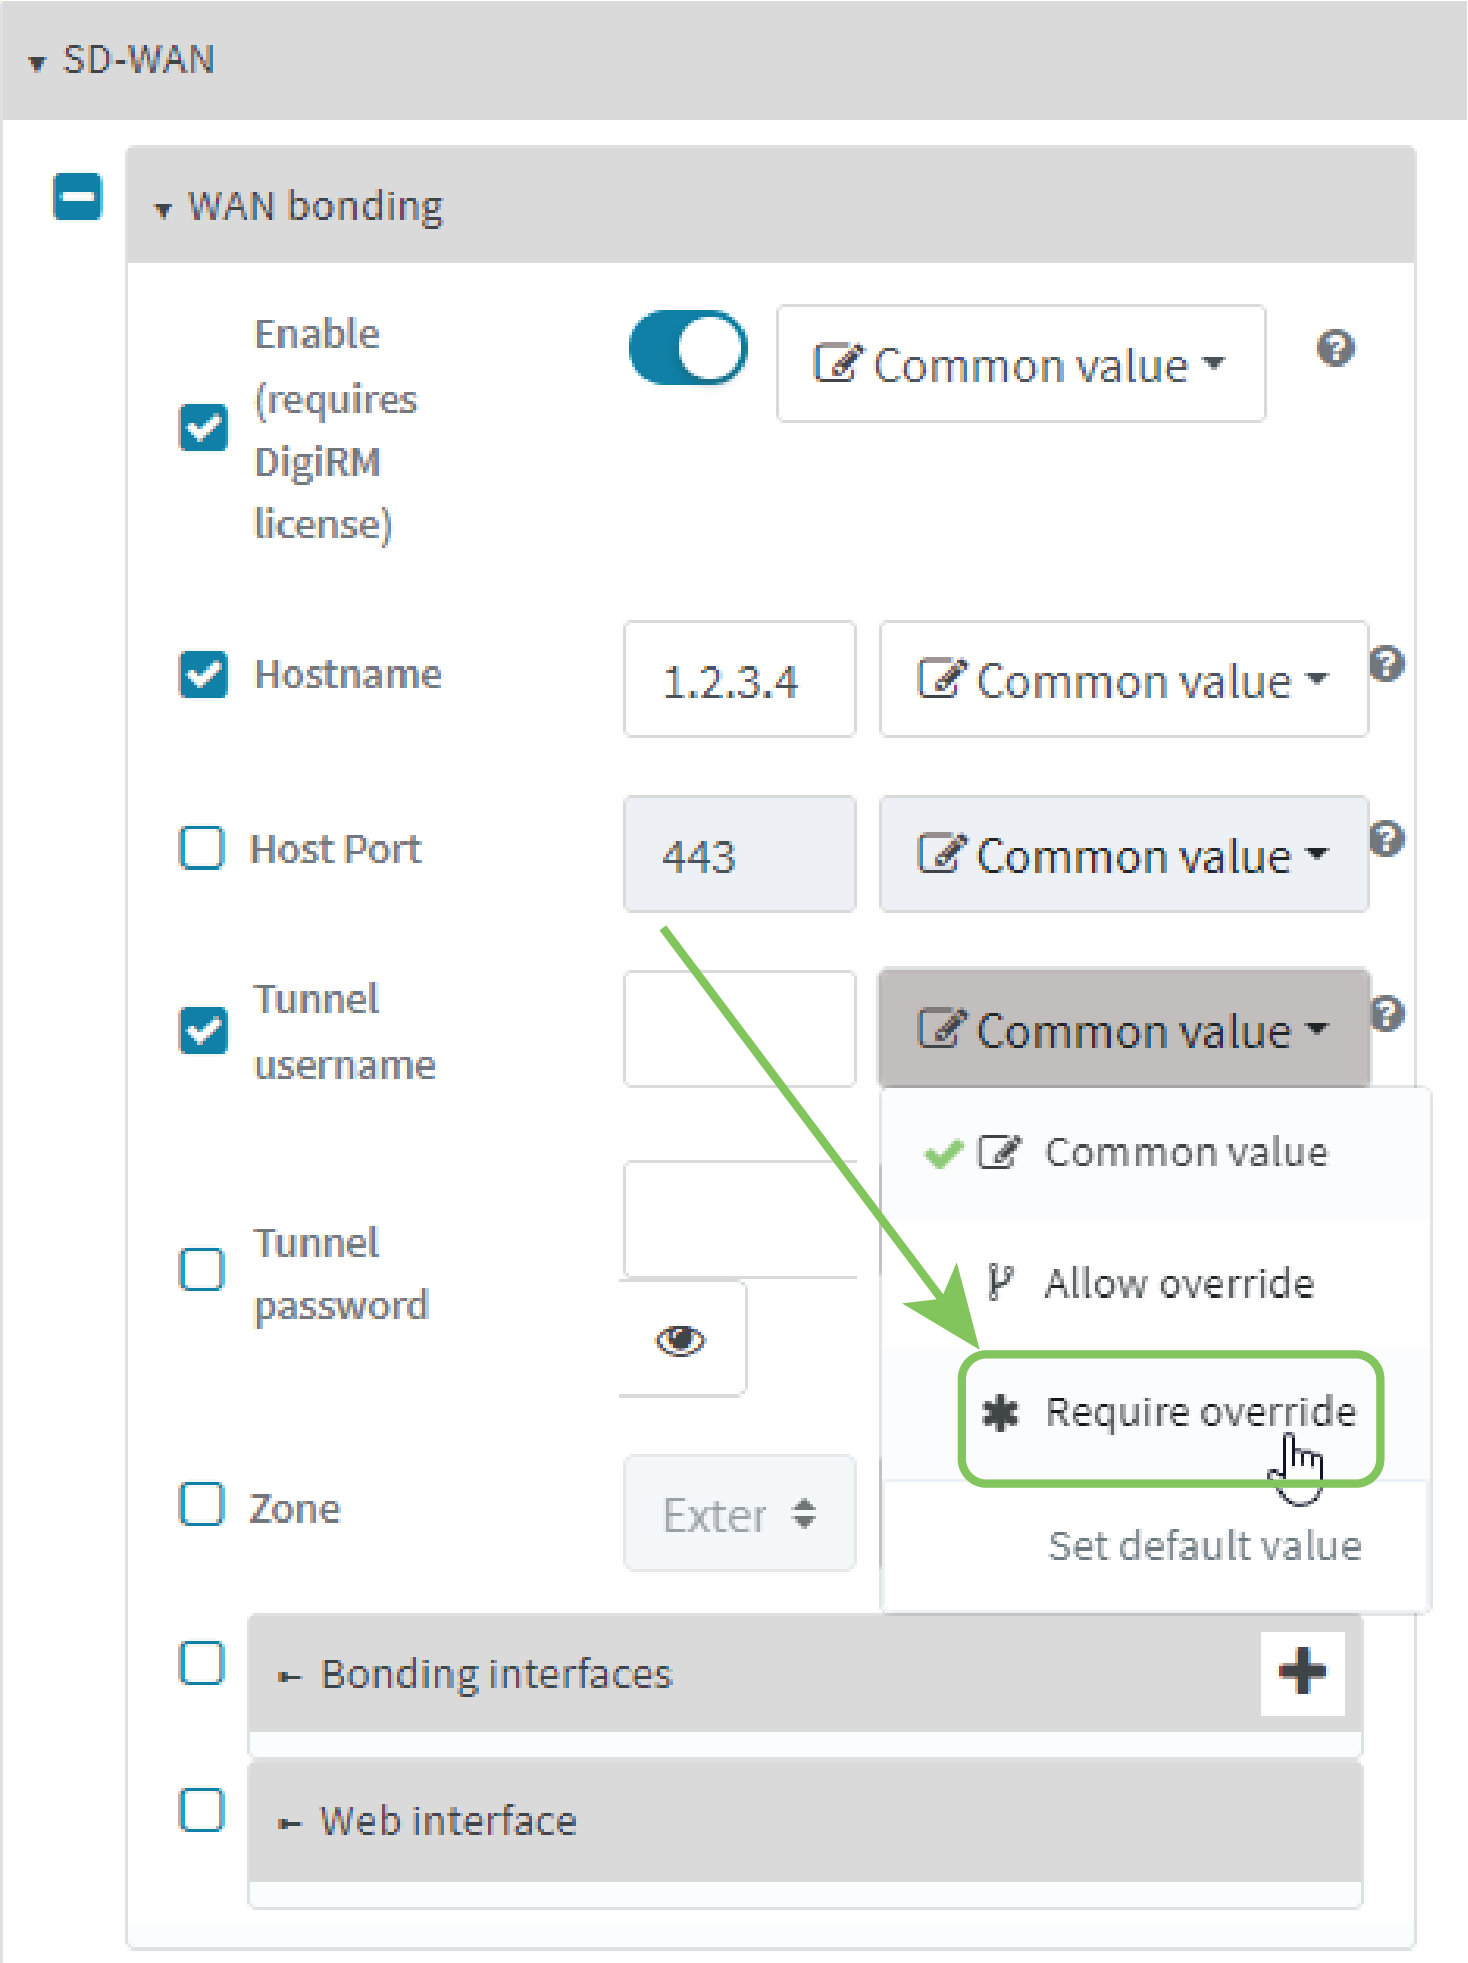
- Click Network > SD-WAN > WAN bonding.
-
-
-
-
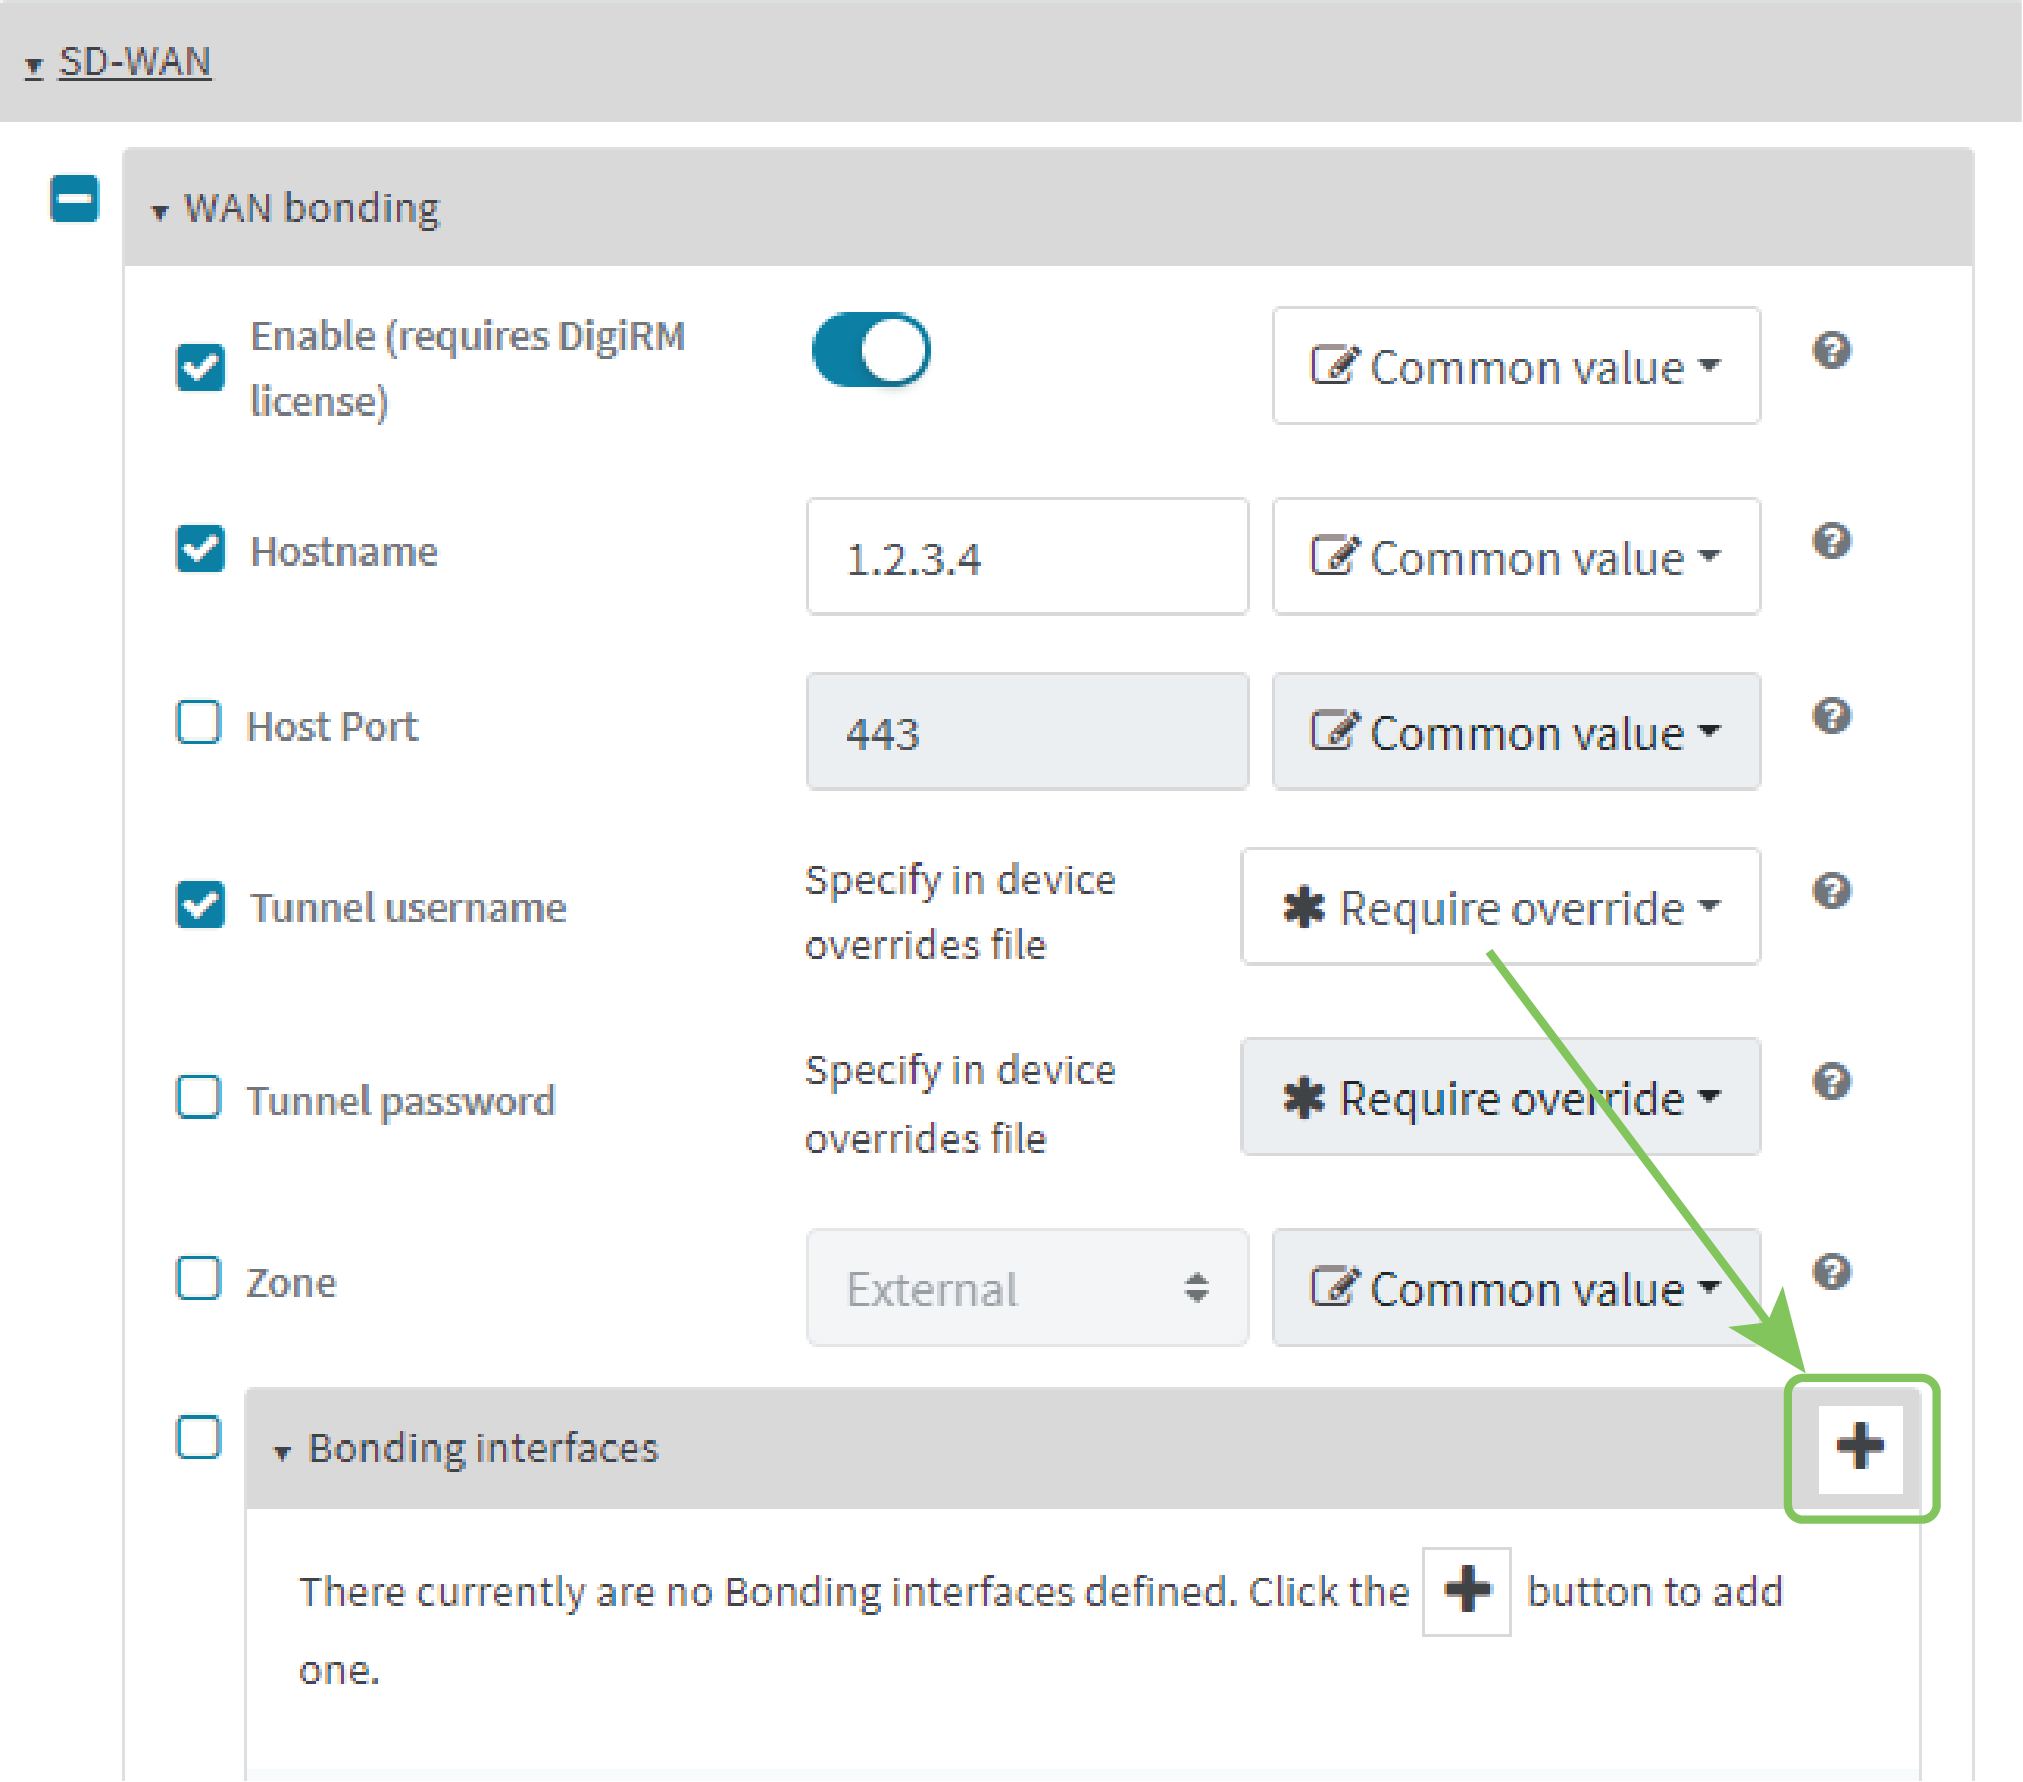
Select Tunnel username.
-
From the Common value menu, select Require override:
-
Select for Tunnel password.
-
From the Common value menu, select Require override:
- Configure the device's WAN interfaces that will be bonded:
- Click
- Click to add an interface.
Note By default, EX15-PR devices prioritize their WAN Ethernet connection over any WWAN cellular connections. Consider this prioritization if using both wired Ethernet and cellular Internet connections. Make sure to add the highest priority in-use interface(s) to the WAN Bonding settings.
Automatic: Automatically sets the mode to Cellular Optimized for Speed-mode for cellular, and Ethernet for non-cellular. This is the default mode.
Cellular Optimized for Speed: A general-purpose configuration suitable for most lines (4G, DSL, etc), with a fair tolerance for packet loss and latency.
Cellular Optimized for Latency: Another preset for mobile connections with an even higher focus on latency.
Ethernet: A preset for direct Ethernet connections, very sensitive to latency and packet loss.
Low Latency: Similar to Ethernet preset, but with higher tolerance for packet loss.
TCP Mode: Utilizes TCP instead of UDP. Higher throughput rate at the cost of latency. Useful in scenarios where UDP is throttled or blocked.
Repeat for additional interfaces.
For example, if you want to bond a wired WAN Ethernet with a cellular modem, add two bonded interfaces: the
- Click
-
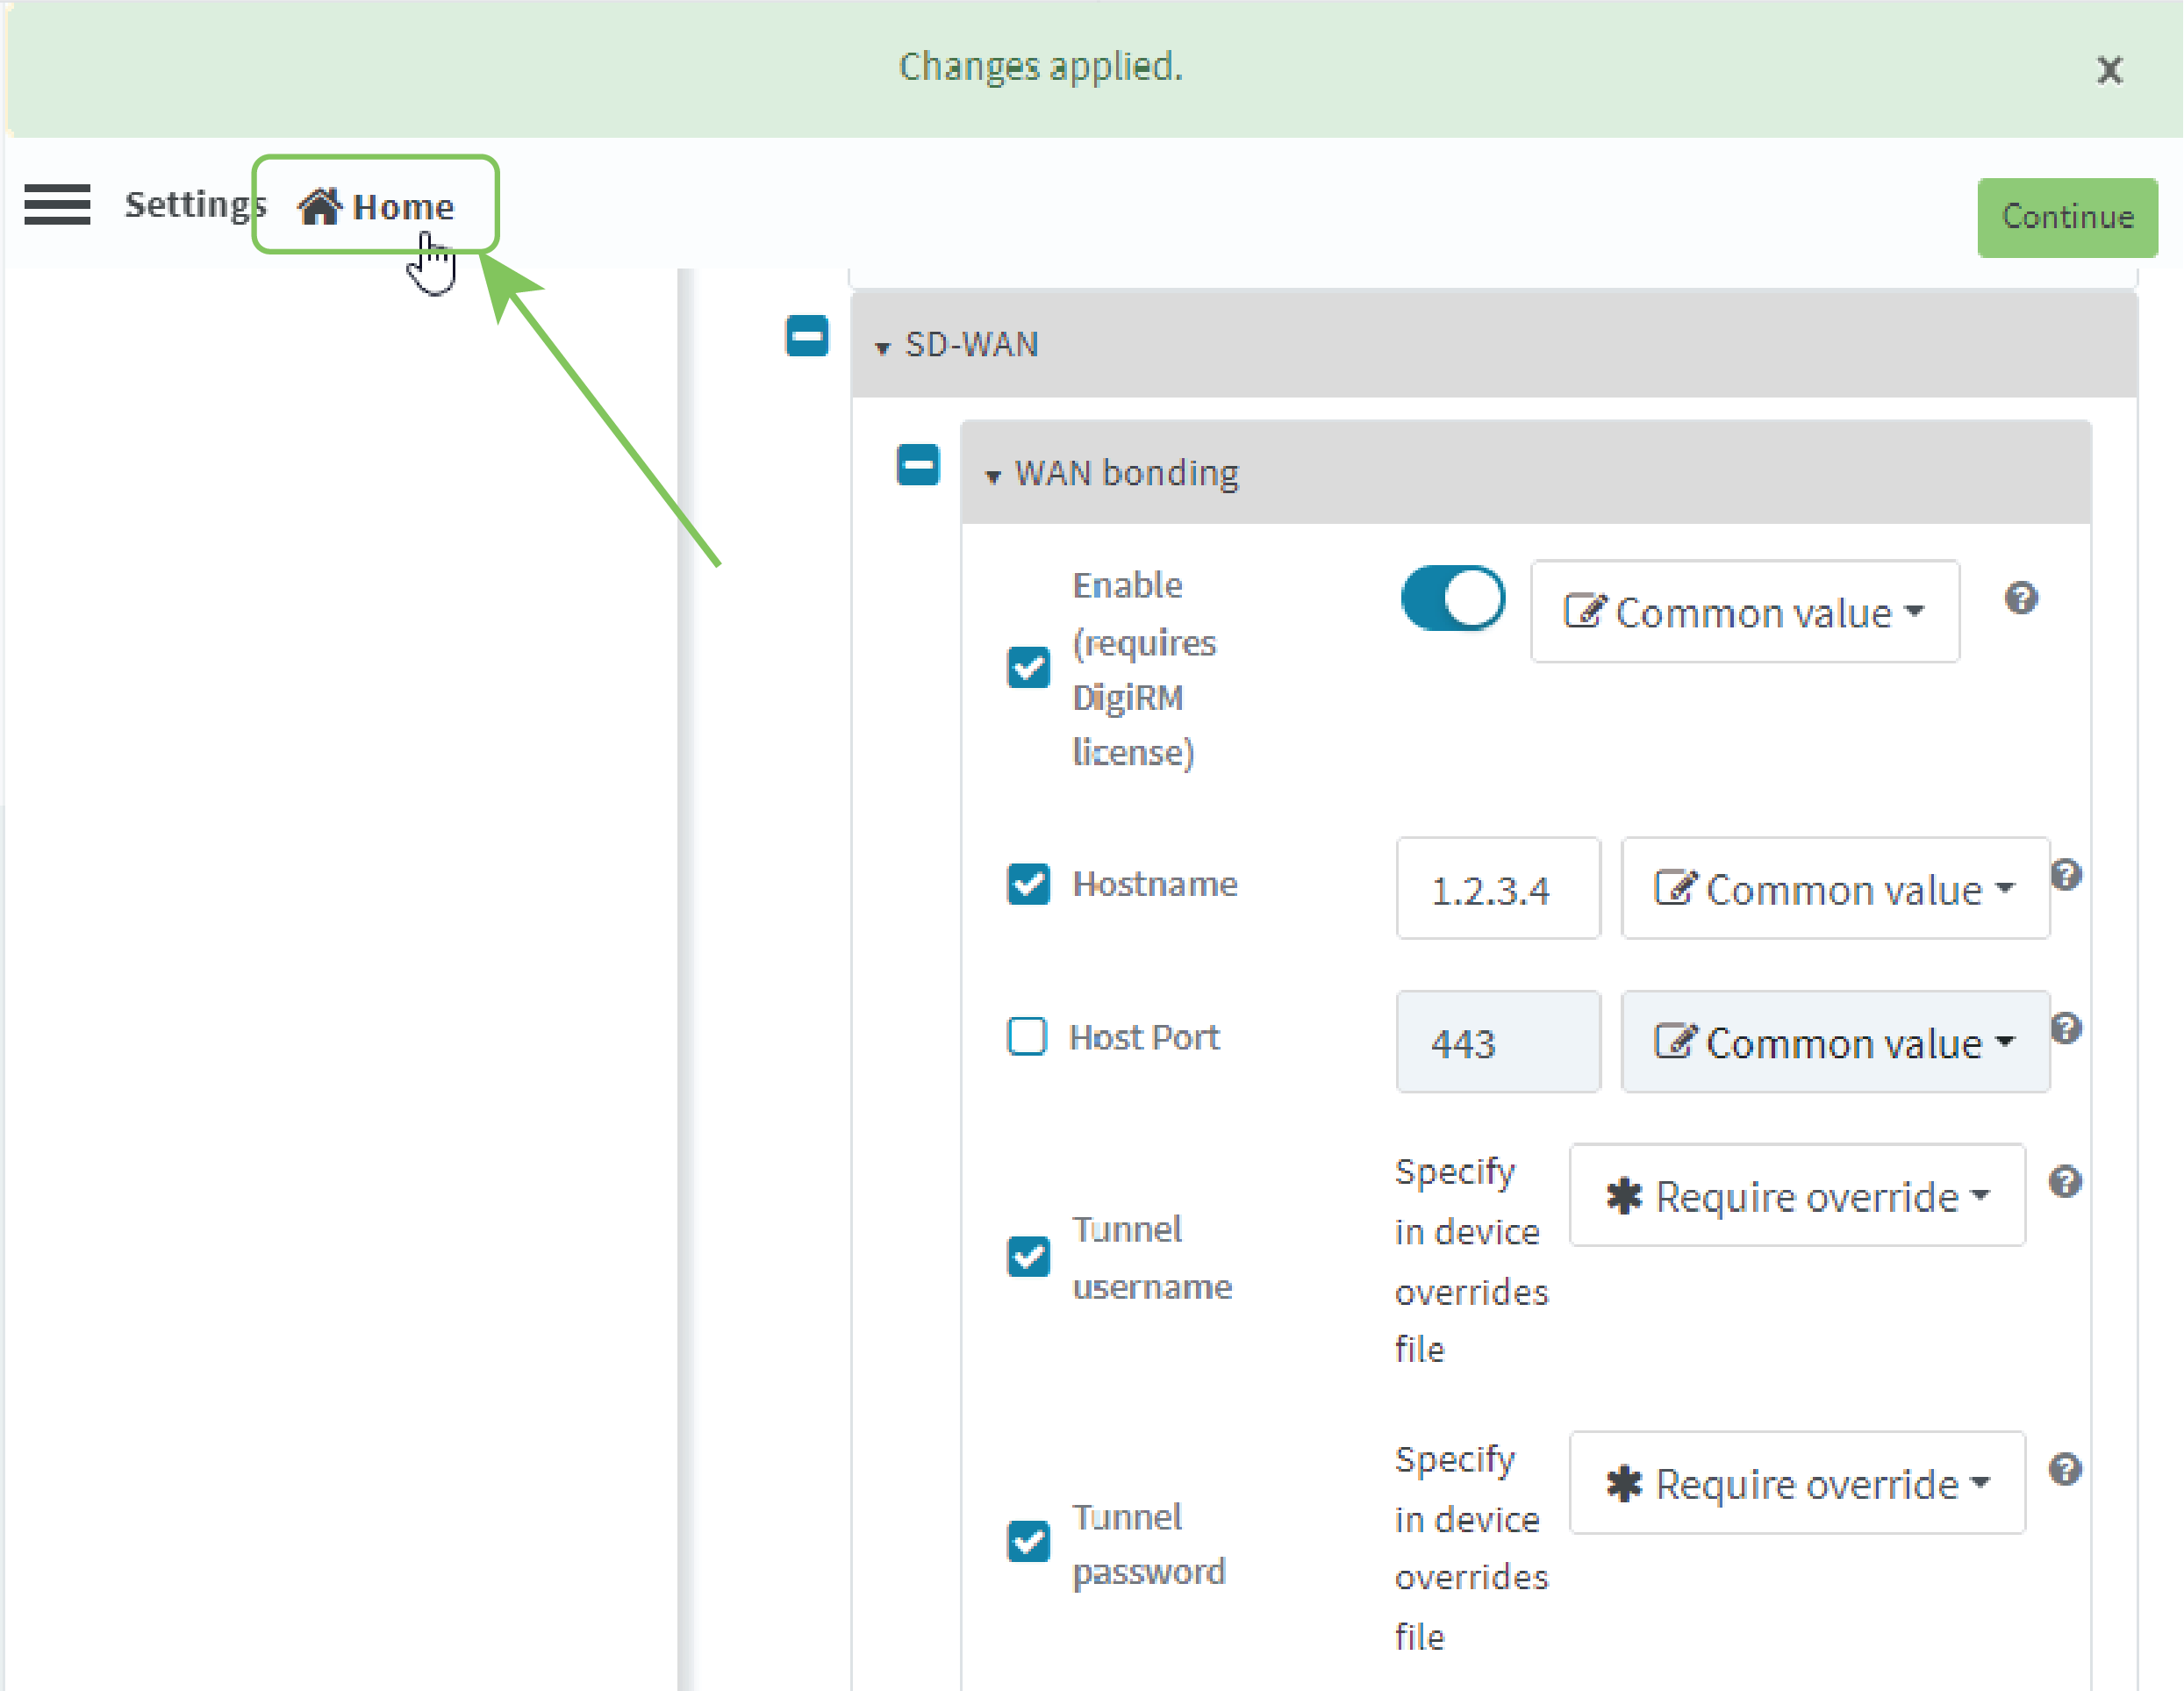
Click Save.

-
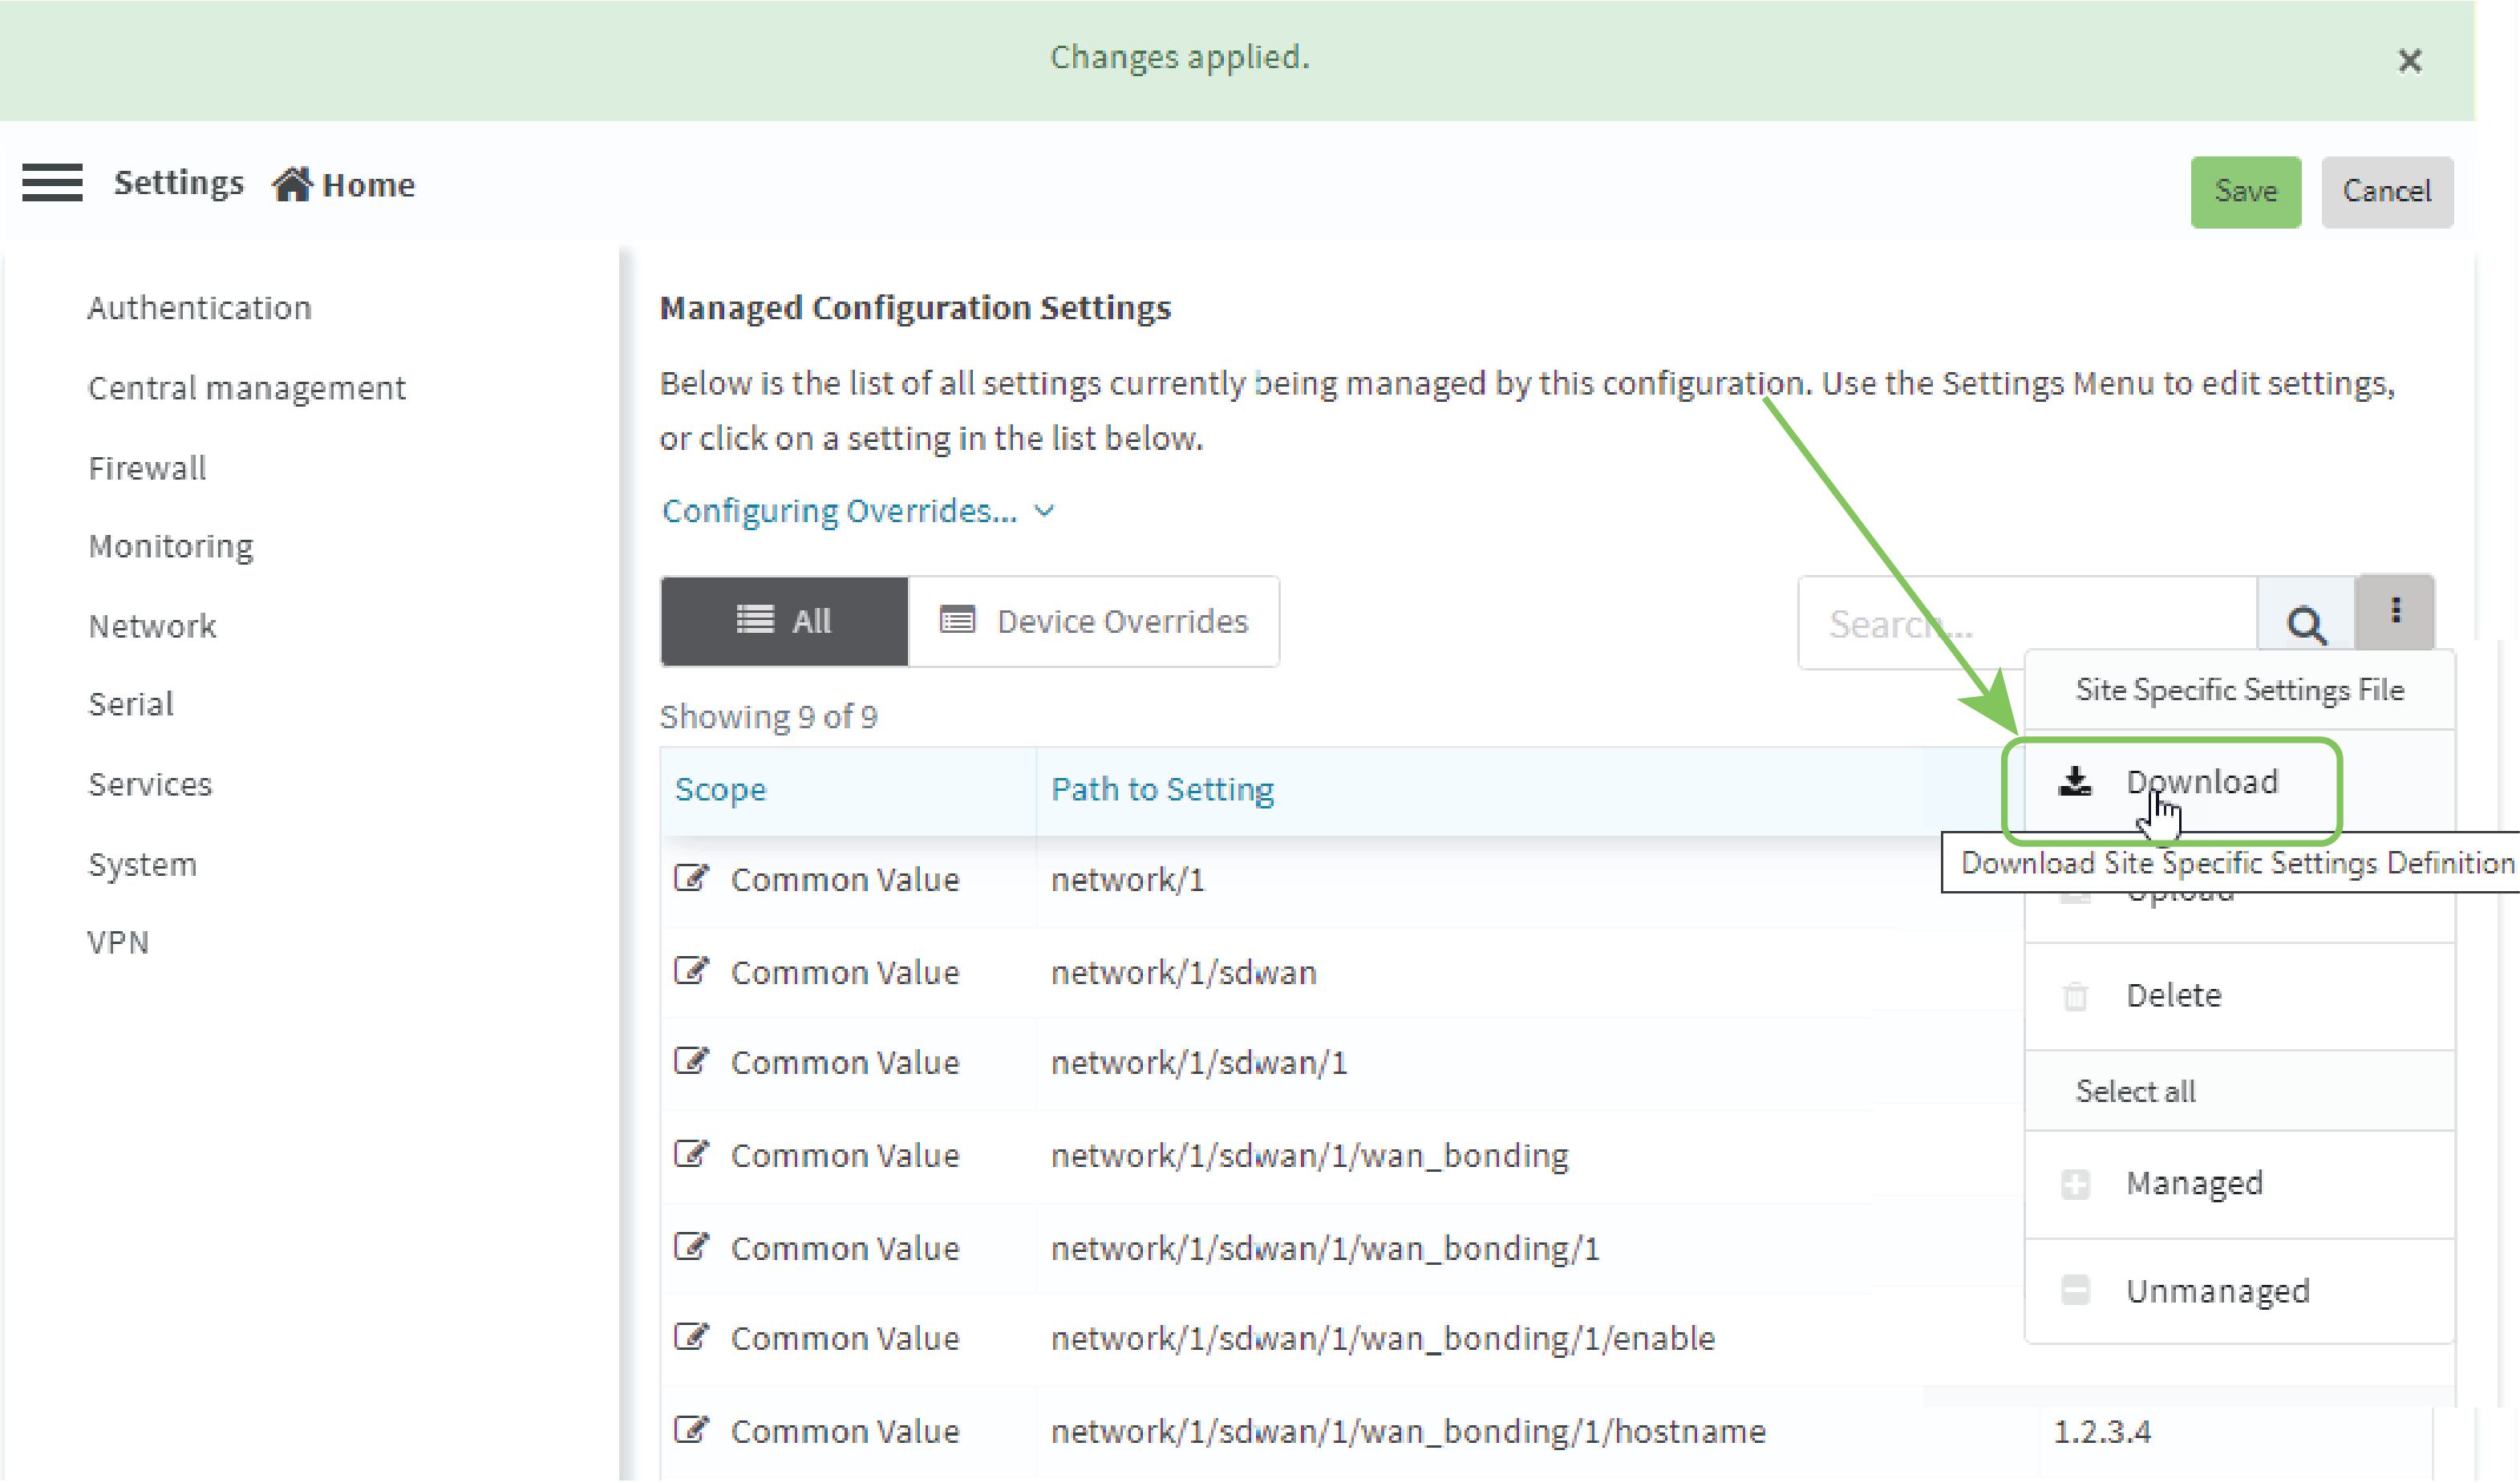
Create a site-specific settings file for the Tunnel username and Tunnel password options:
-
Click Home.
-
Click and select Download to download a CSV file to your local filesystem, which you can use to set site-specific settings.
-
Open the CSV file in a spreadsheet editor (such as Excel).
The file consists key_type and key_value columns, used to identify the device that the site-specific setting applies to, followed by columns for each setting that you designated asRequire site specific settings.
key_type is either device_name or device_id.
key_value is either the device name, or the device ID, depending on the value of key_type.
-
Include the username and password in the CSV file:

-
Save and close the CSV file.
-
In Remote Manager, click and select Upload. Select the edited CSV file.
-
Click Continue.
-
-
For the Automation step in the configuration:
-
Toggle on Enable Scanning.
-
For Action Plan, toggle on Alert and Remediate.
-
Click Save.
-
-
To apply these configuration settings immediately to the devices linked to this configuration template, instead of waiting for the next automated scan and remediation to occur:
-
From the
-
Select the configuration.
-
Click Actions > Scan Now.
-
 PDF
PDF


