Configure the ETH1 Ethernet port as a LAN
This procedure reconfigures the ETH1 port to serve as port for a LAN, which will result in the device having two separate LANs: the default ETH2 LAN, and the LAN created in this procedure. To utilize both LANs, you will need to have a device connected to the ETH1 port, and a separate device connected
If instead, you want the ETH1 port to be
To configure the ETH1 Ethernet port as a LAN:
Web
- Log into Digi Remote Manager, or log into the local Web UI as a user with full Admin access rights.
- Access the device configuration:
 Remote Manager:
- Locate your device as described in Use Digi Remote Manager to view and manage your device.
- Click the Device ID.
- Click Settings.
- Click to expand Config.
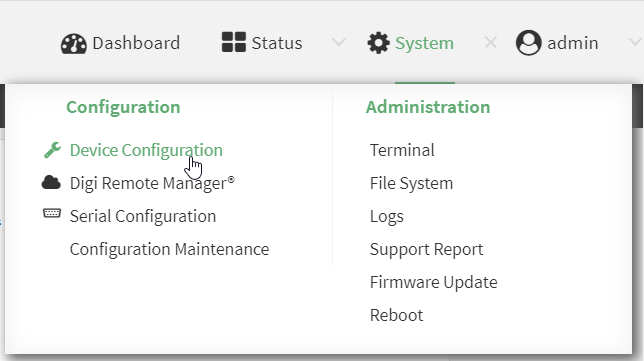
Local Web UI:- On the menu, click System. Under Configuration, click Device Configuration.
The Configuration window is displayed.
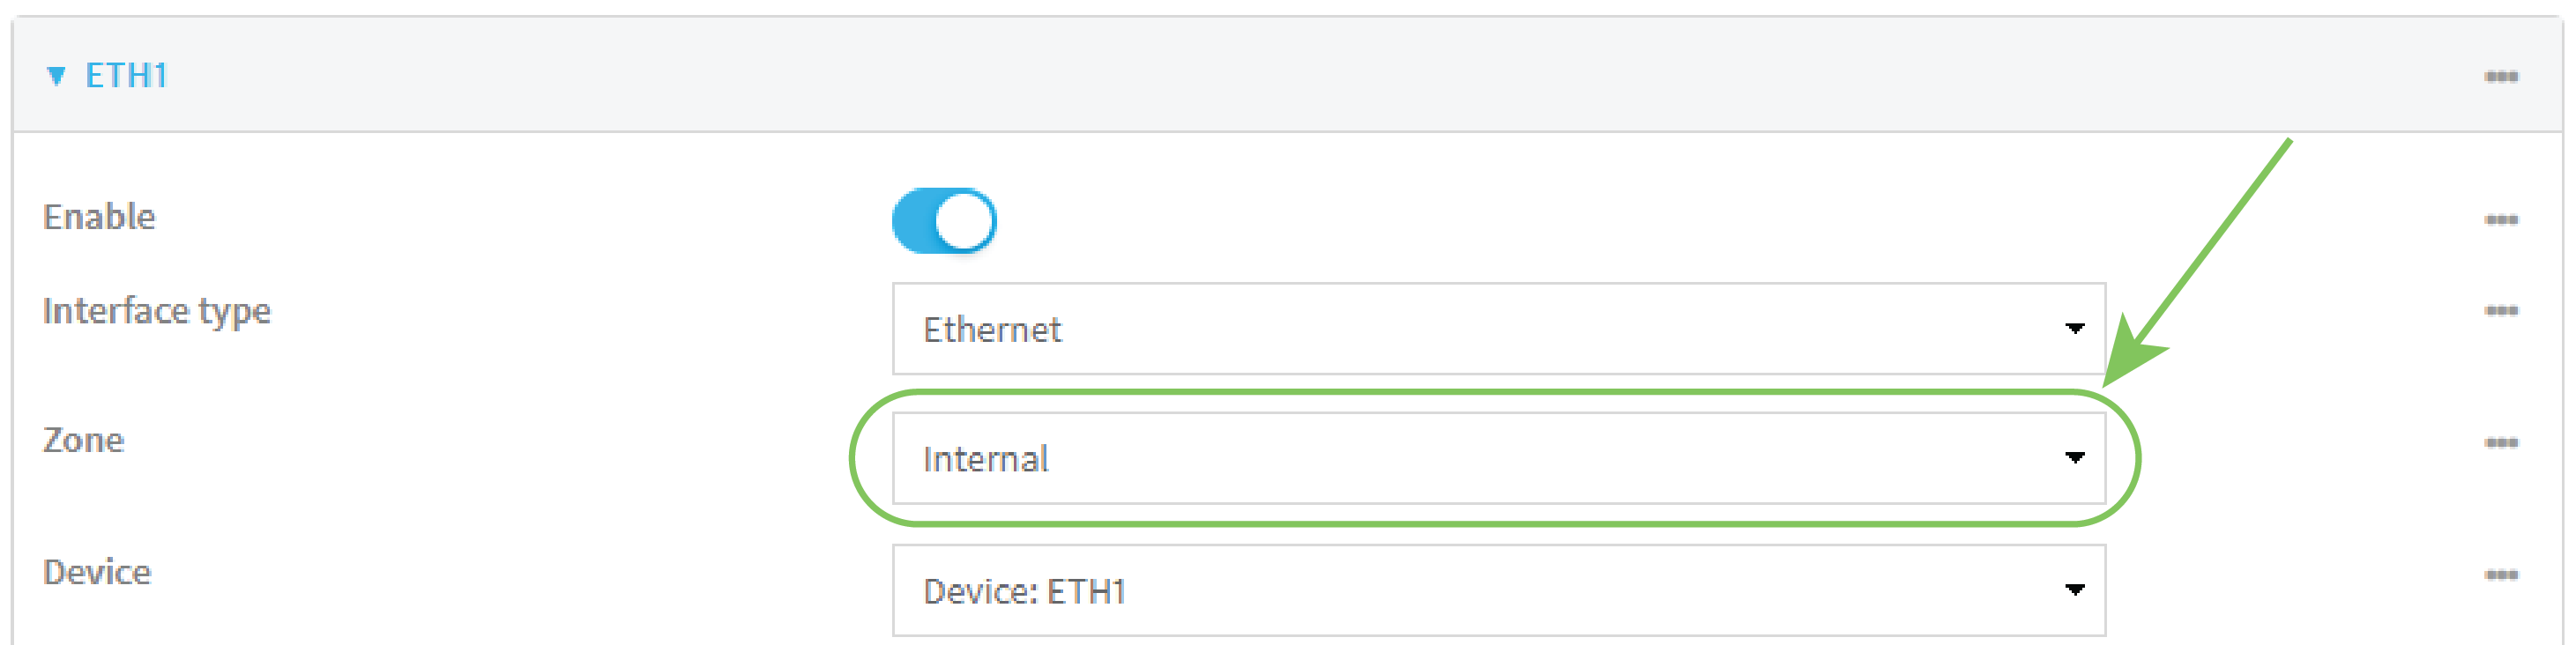
- Click Network > Interfaces > ETH1.
- For Zone, select Internal.
- Configure IPv4 settings:
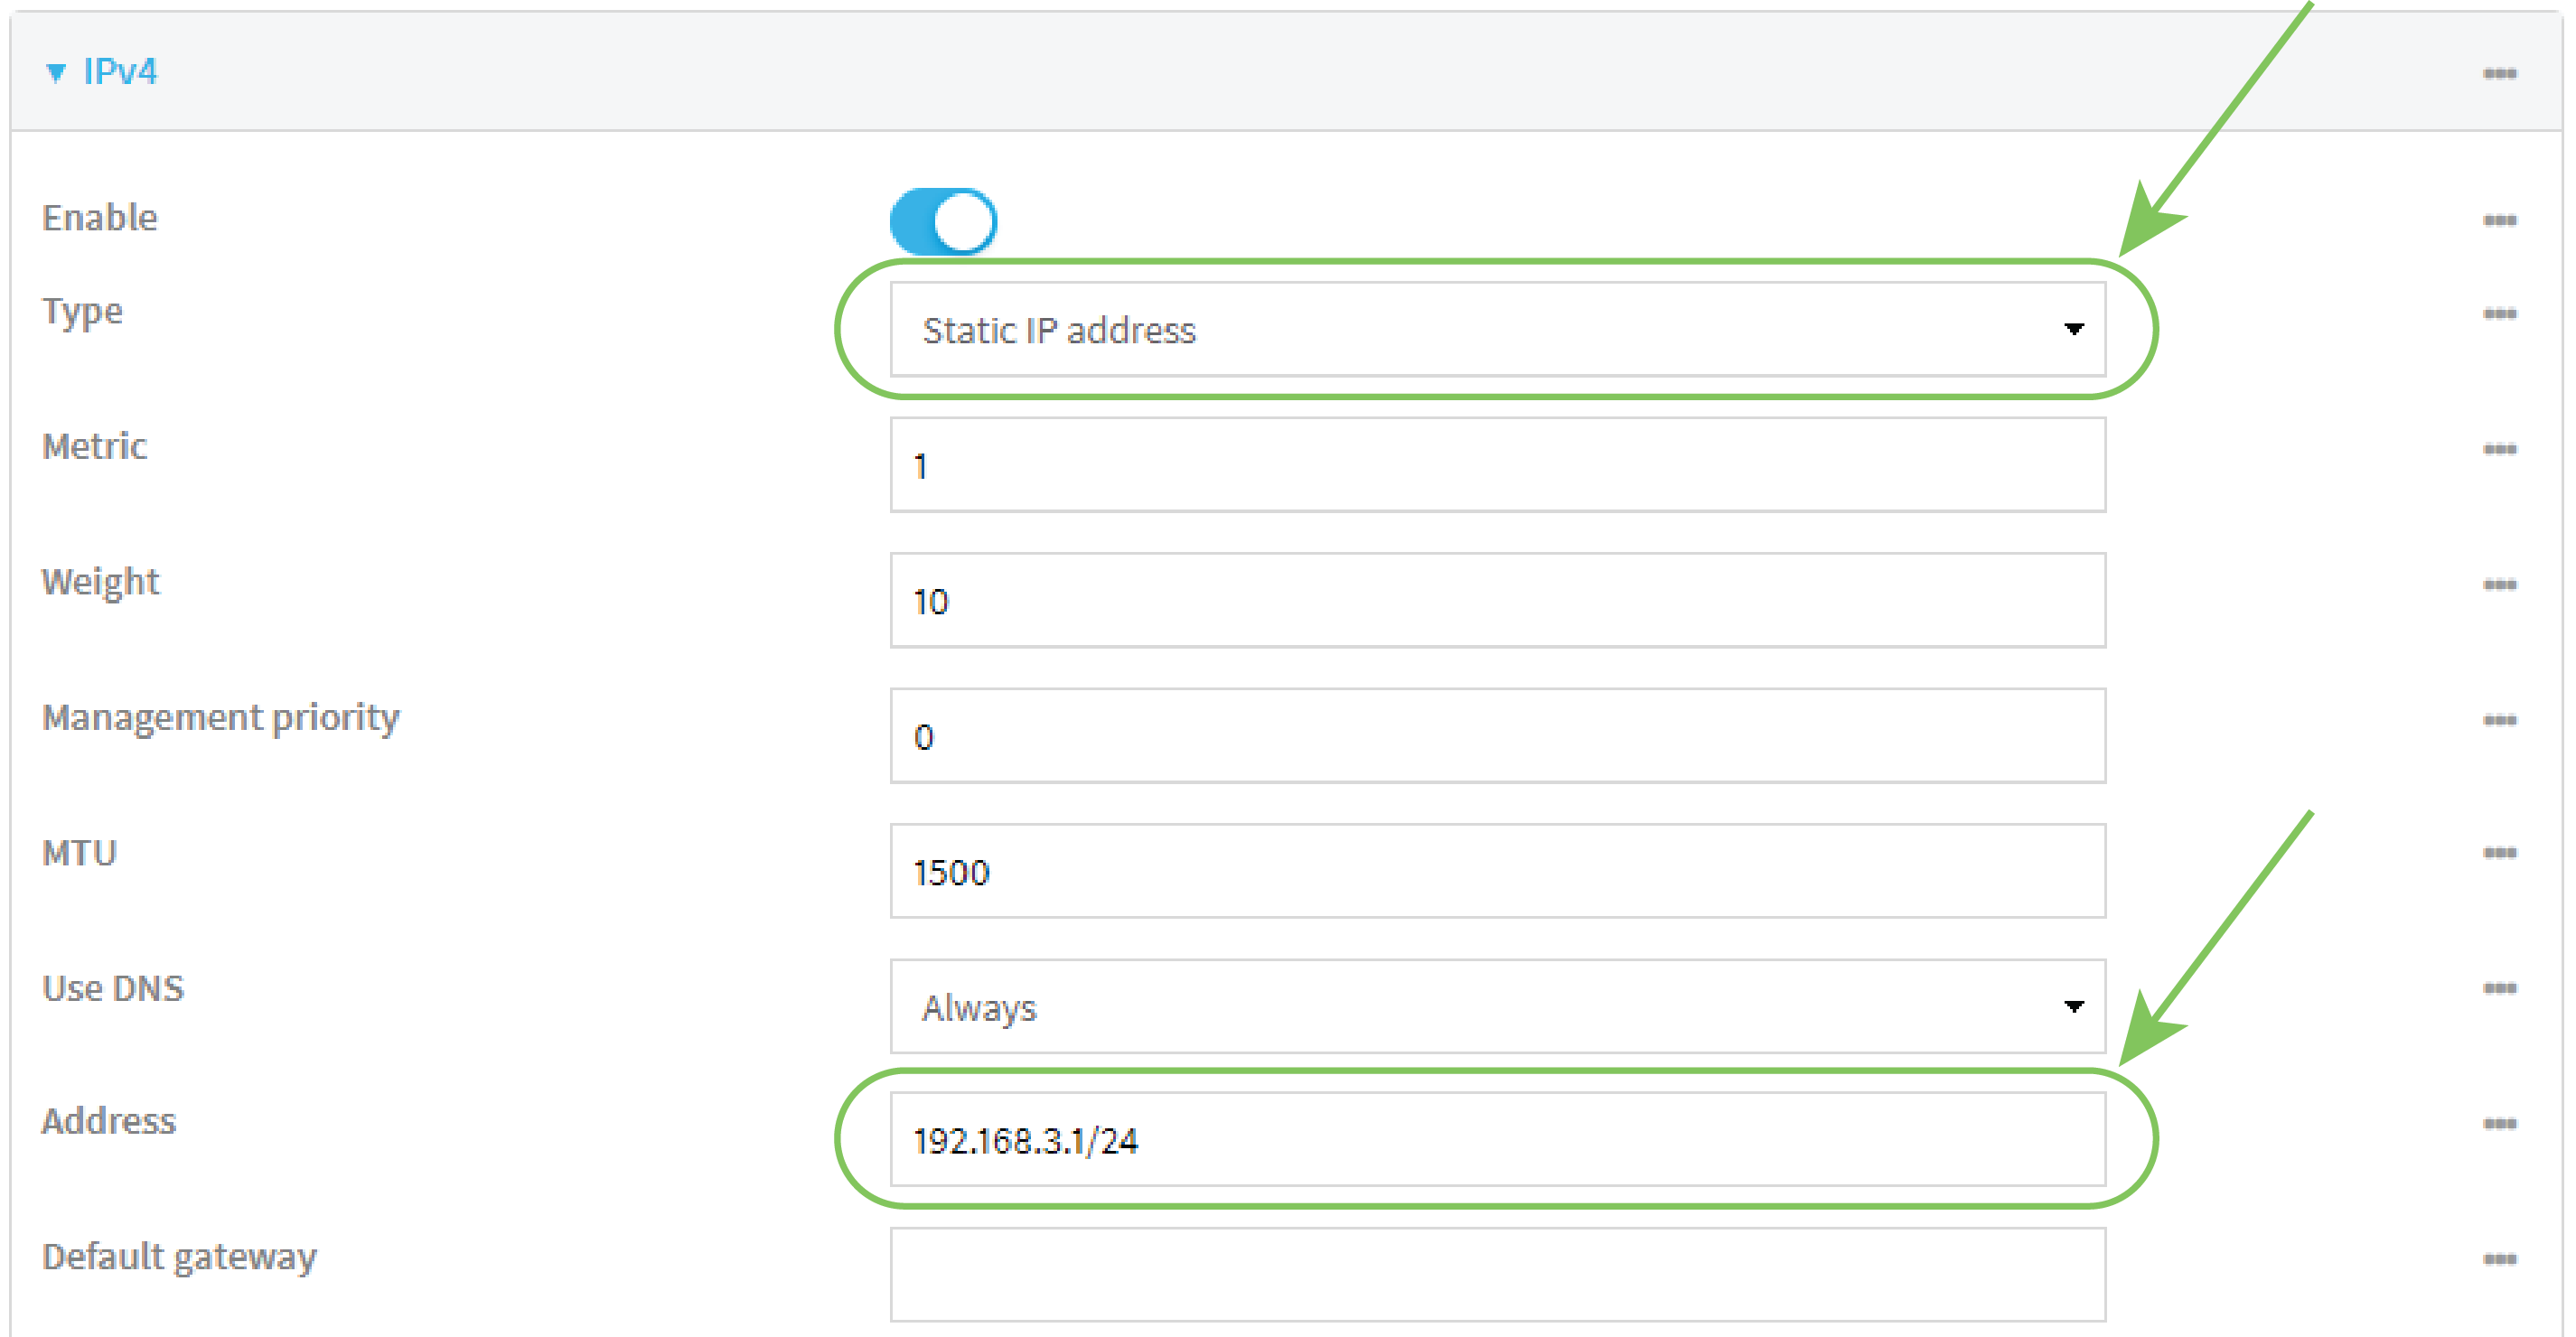
- Click to expand IPv4.
- For Type, select Static IP address.
- For Address, type the IPv4 address and netmask, using the format IPv4_address/netmask, for example, 192.168.3.1/24.
- Enable the DHCP server:
- Click to expand DHCP server.
- Click to toggle on Enable.
- Disable SureLink:
- Click to expand SureLink.
- Click to toggle off Enable.
- (Optional) Configure IPv6 settings:
- Click to expand IPv6.
- For Type, select IPv6 prefix delegation.
- Click Apply to save the configuration and apply the change.
Command line
- Select the device in Remote Manager and click Actions > Open Console, or log into the Connect IT 16/48 local command line as a user with full Admin access rights.
Depending on your device configuration, you may be presented with an Access selection menu. Type admin to access the Admin CLI.
- At the command line, type config to enter configuration mode:
> config
(config)>
- Set the zone to internal:
(config)> network interface eth1 zone internal (config)> - Configure IPv4 settings:
- Set the type to static:
(config)> network interface eth1 ipv4 type static (config)> - Set the address IPv4 address and netmask, using the format IPv4_address/netmask, for example:
(config)> network interface eth1 ipv4 address 192.168.3.1/24 (config)> - Enable the DHCP server:
(config)> network interface eth1 ipv4 dhcp_server enable true (config)> - Disable SureLink:
(config)> network interface eth1 ipv4 surelink enable false
(config)>
- Set the type to static:
- (Optional) Configure IPv6:
- Set the type to prefix_delegation:
(config)> network interface eth1 ipv6 type prefix_delegation
(config)>
- Set the type to prefix_delegation:
- Save the configuration and apply the change.
(config)> save Configuration saved. > - Type exit to exit the Admin CLI.
Depending on your device configuration, you may be presented with an Access selection menu. Type quit to disconnect from the device.
 PDF
PDF


