Connect the hardware
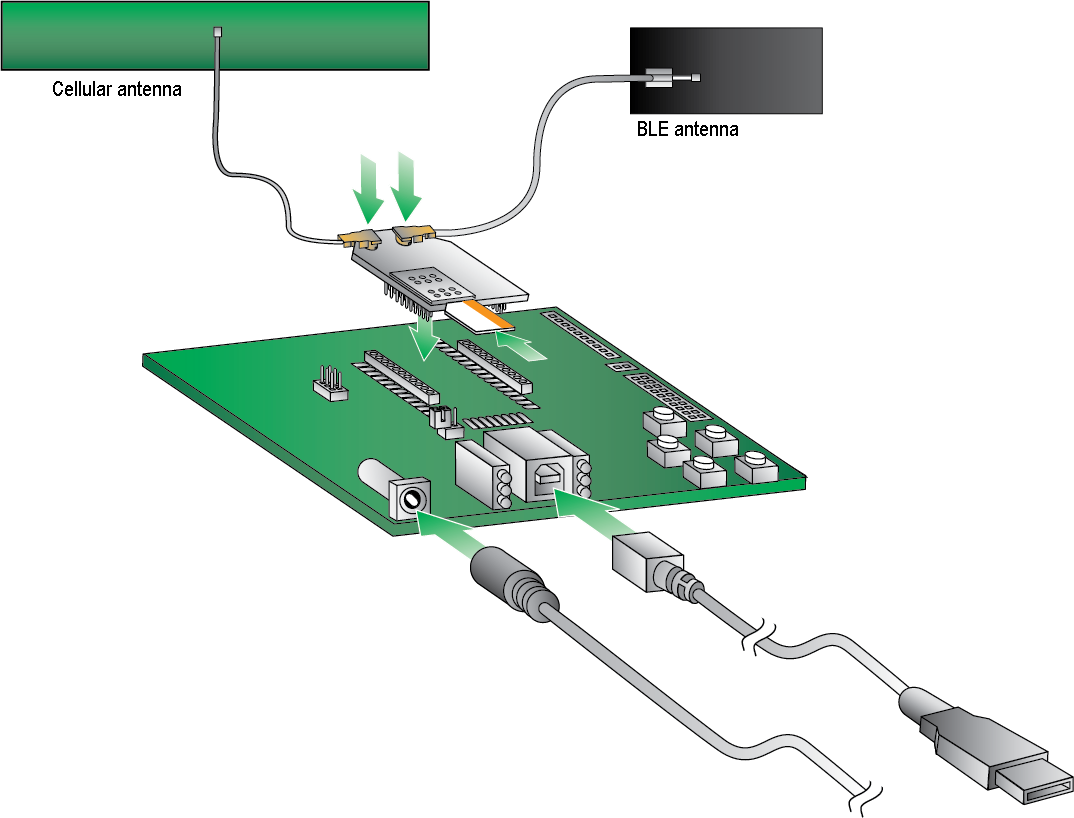
- The XBee 3 Cellular LTE-M/NB-IoT should already be plugged into the development board. For more information about development boards, see Development boards.
- If a SIM card is included with the kit, the card is inserted into the XBee. If a SIM card is not included, install the SIM card into the XBee before attaching the XBee device to the board.
Note Some kits do not include a SIM card. Contact your mobile carrier provider to obtain a SIM card and service. See Determine cellular service and acquire a SIM card.
WARNING! Never insert or remove the SIM card while the device is powered!
- Attach the XBee device to the board.
- Connect the antennas.
- Connect the cellular antenna.
- Connect the BLE antenna if you are using BLE functionality. If you are not, you do not have to connect the BLE antenna.
Note Align the U.FL connectors carefully, then firmly press straight down to seat the connector. You should hear a snap when the antenna attaches correctly. U.FL is fragile and is not designed for multiple insertions, so exercise caution when connecting or removing the antennas. We recommend using a U.FL removal tool.
- Plug the 12 V power supply to the power jack on the development board. The LED indicator blinks when the board is powered.
- Connect the USB cable from a PC to the USB port on the development board. The computer searches for a driver, which can take a few minutes to install. If you have trouble downloading the USB driver, see Other possible issues.
 PDF
PDF


