New Schedule dialog
You can use the New Schedule dialog to create a new schedule. Each schedule must be assigned a name and consists of a set of tasks, a schedule to determine when the tasks should be run, and the device on which the tasks should be performed.
The New Schedule dialog consists of two screens:
- Commands screen: This screen appears by default when you click the New Schedule button. In this screen, you enter the schedule name and select a command. After you have entered these items, the Schedule >> button becomes available.
- Schedule screen: Click Schedule >> in the commands screen to display the schedule screen. In this screen, you specify the schedule on which the tasks should be run and select the device on which the tasks should be performed. When you are in the schedule screen, click Commands >> to return to the commands screen.
Task dialog in the task pane
Each command you add to the schedule appears in an individual dialog in the task pane. You can use the icons in the task dialog toolbar to collapse or expand the dialog, delete the task, or display a description of the task type.
| Button | Description |
|---|---|
|
|
Click Clear to remove all of the tasks from the task pane. |

|
Click this icon to hide or show the information in the task pane. |

|
Click this icon to display a description of this task. |

|
Click this icon to delete the task from the task pane. |

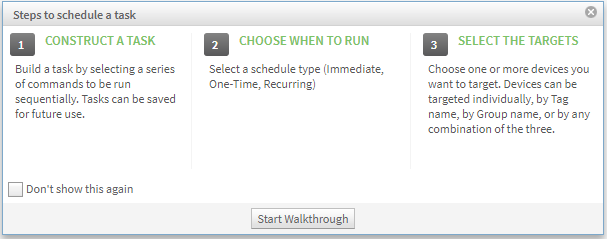
Schedule walk-through feature
When you click New Schedule in the Schedules screen, the Steps to schedule a task dialog may appear, depending on whether the feature is enabled.
- Click Start Walkthrough to have direction about the steps you need to do to create a schedule.
- Select the Don't show this again option if you want to disable the walk-through feature.