Your Connect EZ 8 device's ping responder service replies to ICMP and ICMPv6 echo requests. The service is enabled by default. You can disable the service, or you can configure the service to use an access control list to limit the service to specified IP address, interfaces, and/or zones.
To enable the iPerf3 server:
Web
- Log into Digi Remote Manager, or log into the local Web UI as a user with full Admin access rights.
- Access the device configuration:
 Remote Manager:
- Locate your device as described in Use Digi Remote Manager to view and manage your device.
- Click the Device ID.
- Click Settings.
- Click to expand Config.
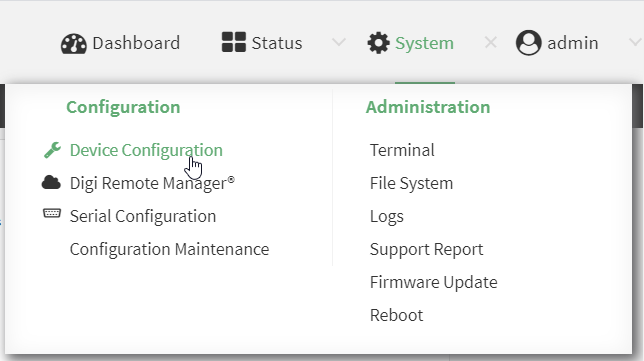
Local Web UI:- On the menu, click System. Under Configuration, click Device Configuration.
The Configuration window is displayed.
- Click Services > Ping responder.
The ping responder service is enabled by default. Click Enable to disable all ping responses.
- Click to expand Access control list to restrict ping responses to specified IP address, interfaces, and/or zones:
- To limit access to specified IPv4 addresses and networks:
- Click IPv4 Addresses.
- For Add Address, click .
- For Address, enter the IPv4 address or network that can access the device's ping responder. Allowed values are:
- A single IP address or host name.
- A network designation in CIDR notation, for example, 192.168.1.0/24.
- any: No limit to IPv4 addresses that can access the ping responder.
- Click again to list additional IP addresses or networks.
- To limit access to specified IPv6 addresses and networks:
- Click IPv6 Addresses.
- For Add Address, click .
- For Address, enter the IPv6 address or network that can access the device's ping responder. Allowed values are:
- A single IP address or host name.
- A network designation in CIDR notation, for example, 2001:db8::/48.
- any: No limit to IPv6 addresses that can access the ping responder.
- Click again to list additional IP addresses or networks.
- To limit access to hosts connected through a specified interface on the device:
- Click Interfaces.
- For Add Interface, click .
- For Interface, select the appropriate interface from the dropdown.
- Click again to allow access through additional interfaces.
- To limit access based on firewall zones:
- Click Zones. By default, there are three firewall zones already configured: Internal, Edge, and IPsec.
- For Add Zone, click .
- For Zone, select the appropriate firewall zone from the dropdown.
See Firewall configuration for information about firewall zones.
- Click again to allow access through additional firewall zones.
- To limit access to specified IPv4 addresses and networks:
- Click Apply to save the configuration and apply the change.
Command line
- Select the device in Remote Manager and click Actions > Open Console, or log into the Connect EZ 8 local command line as a user with full Admin access rights.
Depending on your device configuration, you may be presented with an Access selection menu. Type admin to access the Admin CLI.
- At the command line, type config to enter configuration mode:
> config
(config)>
- Enable the iPerf server:
(config)> service iperf enable true
(config)>
- (Optional) Set the port number for the iPerf server listening port. The default is 5201.
(config)> service iperf port port_number
(config)>
-
(Optional) Set the access control list to restrict access to the iPerf server:
- To limit access to specified IPv4 addresses and networks:
(config)> add service iperf acl address end value
(config)>
Where value can be:
- A single IP address or host name.
- A network designation in CIDR notation, for example, 192.168.1.0/24.
- any: No limit to IPv4 addresses that can access the service-type.
Repeat this step to list additional IP addresses or networks.
- To limit access to specified IPv6 addresses and networks:
(config)> add service iperf acl address6 end value
(config)>
Where value can be:
- A single IP address or host name.
- A network designation in CIDR notation, for example, 2001:db8::/48.
- any: No limit to IPv6 addresses that can access the service-type.
Repeat this step to list additional IP addresses or networks.
- To limit access to hosts connected through a specified interface on the Connect EZ 8 device:
(config)> add service iperf acl interface end value
(config)>
Where value is an interface defined on your device.
Display a list of available interfaces:Use ... network interface ? to display interface information:
Repeat this step to list additional interfaces.
- To limit access based on firewall zones:
(config)> add service iperf acl zone end value
(config)>
Where value is a firewall zone defined on your device, or the any keyword.
Display a list of available firewall zones:Type ... firewall zone ? at the config prompt:
(config)> ... firewall zone ?

Zones: A list of groups of network interfaces that can be referred to by packet
filtering rules and access control lists.

 Additional Configuration
 -------------------------------------------------------------------------------
  any
  dynamic_routes
  edge
  external
  internal
  ipsec
  loopback
  setup

(config)>
Repeat this step to include additional firewall zones.
- To limit access to specified IPv4 addresses and networks:
- Save the configuration and apply the change.
(config)> save Configuration saved. > - Type exit to exit the Admin CLI.
Depending on your device configuration, you may be presented with an Access selection menu. Type quit to disconnect from the device.
Example performance test using iPerf3
On a remote host with Iperf3 installed, enter the following command:
$ iperf3 -c device_ip
where device_ip is the IP address of the Connect EZ 8 device. For example:
$ iperf3 -c 192.168.2.1
Connecting to host 192.168.2.1, port 5201
[  4] local 192.168.3.100 port 54934 connected to 192.168.1.1 port 5201
[ ID] Interval           Transfer     Bandwidth       Retr  Cwnd
[  4]   0.00-1.00   sec  26.7 MBytes   224 Mbits/sec    8   2.68 MBytes
[  4]   1.00-2.00   sec  28.4 MBytes   238 Mbits/sec   29   1.39 MBytes
[  4]   2.00-3.00   sec  29.8 MBytes   250 Mbits/sec    0   1.46 MBytes
[  4]   3.00-4.00   sec  31.2 MBytes   262 Mbits/sec    0   1.52 MBytes
[  4]   4.00-5.00   sec  32.1 MBytes   269 Mbits/sec    0   1.56 MBytes
[  4]   5.00-6.00   sec  32.5 MBytes   273 Mbits/sec    0   1.58 MBytes
[  4]   6.00-7.00   sec  33.9 MBytes   284 Mbits/sec    0   1.60 MBytes
[  4]   7.00-8.00   sec  33.7 MBytes   282 Mbits/sec    0   1.60 MBytes
[  4]   8.00-9.00   sec  33.5 MBytes   281 Mbits/sec    0   1.60 MBytes
[  4]   9.00-10.00  sec  33.2 MBytes   279 Mbits/sec    0   1.60 MBytes
- - - - - - - - - - - - - - - - - - - - - - - - -
[ ID] Interval           Transfer     Bandwidth       Retr
[  4]   0.00-10.00  sec   315 MBytes   264 Mbits/sec   37             sender
[  4]   0.00-10.00  sec   313 MBytes   262 Mbits/sec                  receiver

iperf Done.
$
 PDF
PDF


