You can configure DHCP servers running on your Connect EZ device to send certain specified DHCP options to DHCP clients. You can also set the user class, which enables you to specify which specific DHCP clients will receive the option. You can also force the command to be sent to the clients.
DHCP options can be set on a per-LAN basis, or can be set for all LANs. A total of 32 DHCP options can be configured.
Required configuration items
- DHCP option number.
- Value for the DHCP option.
Additional configuration items
- The data type of the value.
- Force the option to be sent to the DHCP clients.
- A label for the custom option.
Web
- Log into Digi Remote Manager, or log into the local Web UI as a user with full Admin access rights.
- Access the device configuration:
 Remote Manager:
- Locate your device as described in Use Digi Remote Manager to view and manage your device.
- Click the Device ID.
- Click Settings.
- Click to expand Config.
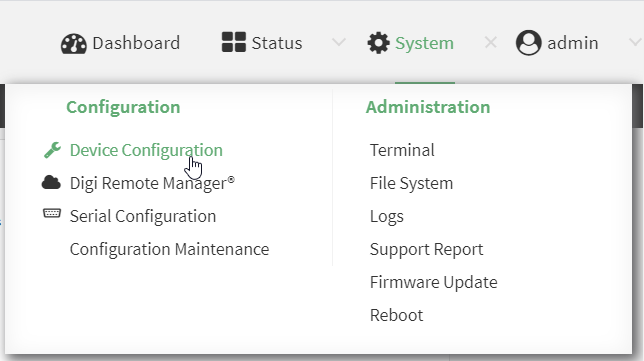
Local Web UI:- On the menu, click System. Under Configuration, click Device Configuration.
The Configuration window is displayed.
- Click Network > Interfaces.
- Click to expand an existing LAN, or create a new LAN. See
- Click to expand IPv4 > DHCP server > Advanced settings > Custom DHCP option.
- For Add Custom option, click .
Custom options are enabled by default. To disable, toggle off Enable.
- For Option number, type the DHCP option number.
- For Value, type the value of the DHCP option.
- (Optional) For Label, type a label for the custom option.
- (Optional) If Forced send is enabled, the DHCP option will always be sent to the client, even if the client does not ask for it.
- (Optional) For Data type, select the data type that the option uses. If the incorrect data type is selected, the device will send the value as a string.
- Click Apply to save the configuration and apply the change.
Command line
- Select the device in Remote Manager and click Actions > Open Console, or log into the Connect EZ 8 local command line as a user with full Admin access rights.
Depending on your device configuration, you may be presented with an Access selection menu. Type admin to access the Admin CLI.
- At the command line, type config to enter configuration mode:
> config
(config)>
- Add a custom DHCP option to the DHCP server configuration for an existing LAN. For example, to add static lease to a LAN named my_lan:
(config)> add network interface my_lan ipv4 dhcp_server advanced custom_option end
(config network interface my_lan ipv4 dhcp_server advanced custom_option 0)>
See
- Custom options are enabled by default. To disable:
(config network interface my_lan ipv4 dhcp_server advanced custom_option 0)> enable false
(config network interface my_lan ipv4 dhcp_server advanced custom_option 0)>
- Set the option number for the DHCP option:
(config network interface my_lan ipv4 dhcp_server advanced custom_option 0)> option 210
(config network interface my_lan ipv4 dhcp_server advanced custom_option 0)>
- Set the value for the DHCP option:
(config network interface my_lan ipv4 dhcp_server advanced custom_option 0)> value_str value
(network interface my_lan ipv4 dhcp_server advanced custom_option 0)>
-
(Optional) Set a label for this custom option:
(config network interface my_lan ipv4 dhcp_server advanced custom_option 0)> name label
(config network interface my_lan ipv4 dhcp_server advanced custom_option 0)>
-
(Optional) To force the DHCP option to always be sent to the client, even if the client does not ask for it:
(config network interface my_lan ipv4 dhcp_server advanced custom_option 0)> force true
(config network interface my_lan ipv4 dhcp_server advanced custom_option 0)>
-
(Optional) Set the data type that the option uses.
If the incorrect data type is selected, the device will send the value as a string.
(config network interface my_lan ipv4 dhcp_server advanced custom_option 0)> datatype value
(config network interface my_lan ipv4 dhcp_server advanced custom_option 0)>
where value is one of:
-
1byte
-
2byte
-
4byte
-
hex
-
ipv4
-
str
The default is str.
-
- Save the configuration and apply the change.
(config network interface my_lan ipv4 dhcp_server advanced custom_option 0)> save Configuration saved. > - Type exit to exit the Admin CLI.
Depending on your device configuration, you may be presented with an Access selection menu. Type quit to disconnect from the device.
 PDF
PDF


